Creating Lists
Every list type in Engage is created within a folder. Follow the steps defined below to create a new list.
1. On the lists dashboard, choose whether to create a shared list or for your personal use.
2. For personal use, click on My List and select Create a List. You can also add a subfolder and create a list within it. For shared purpose, click Shared List, select a folder and click Create a List.
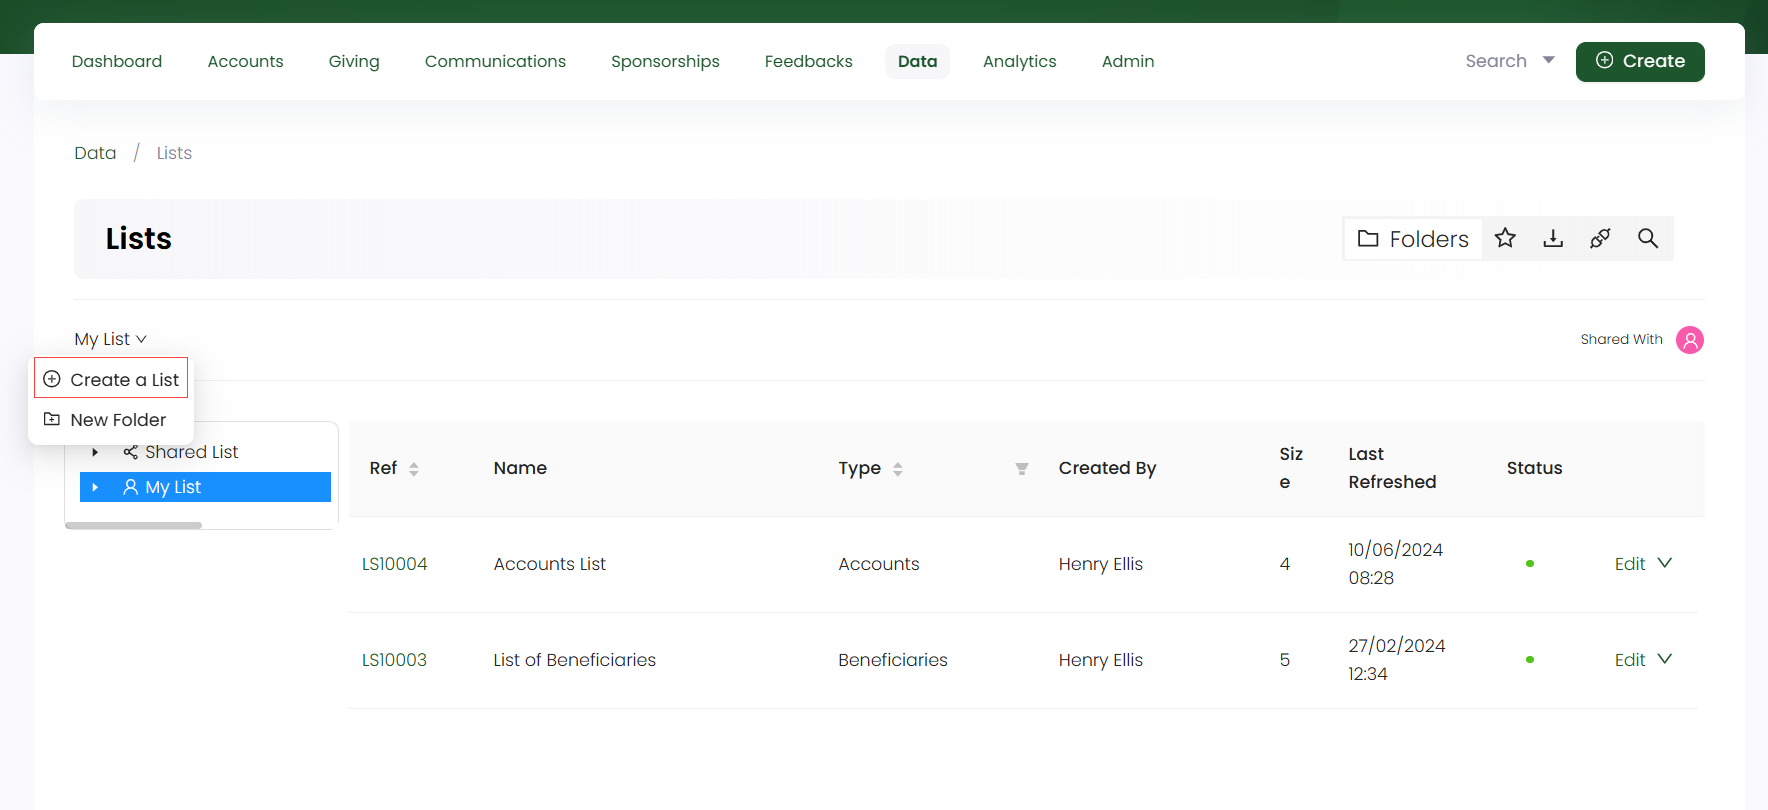
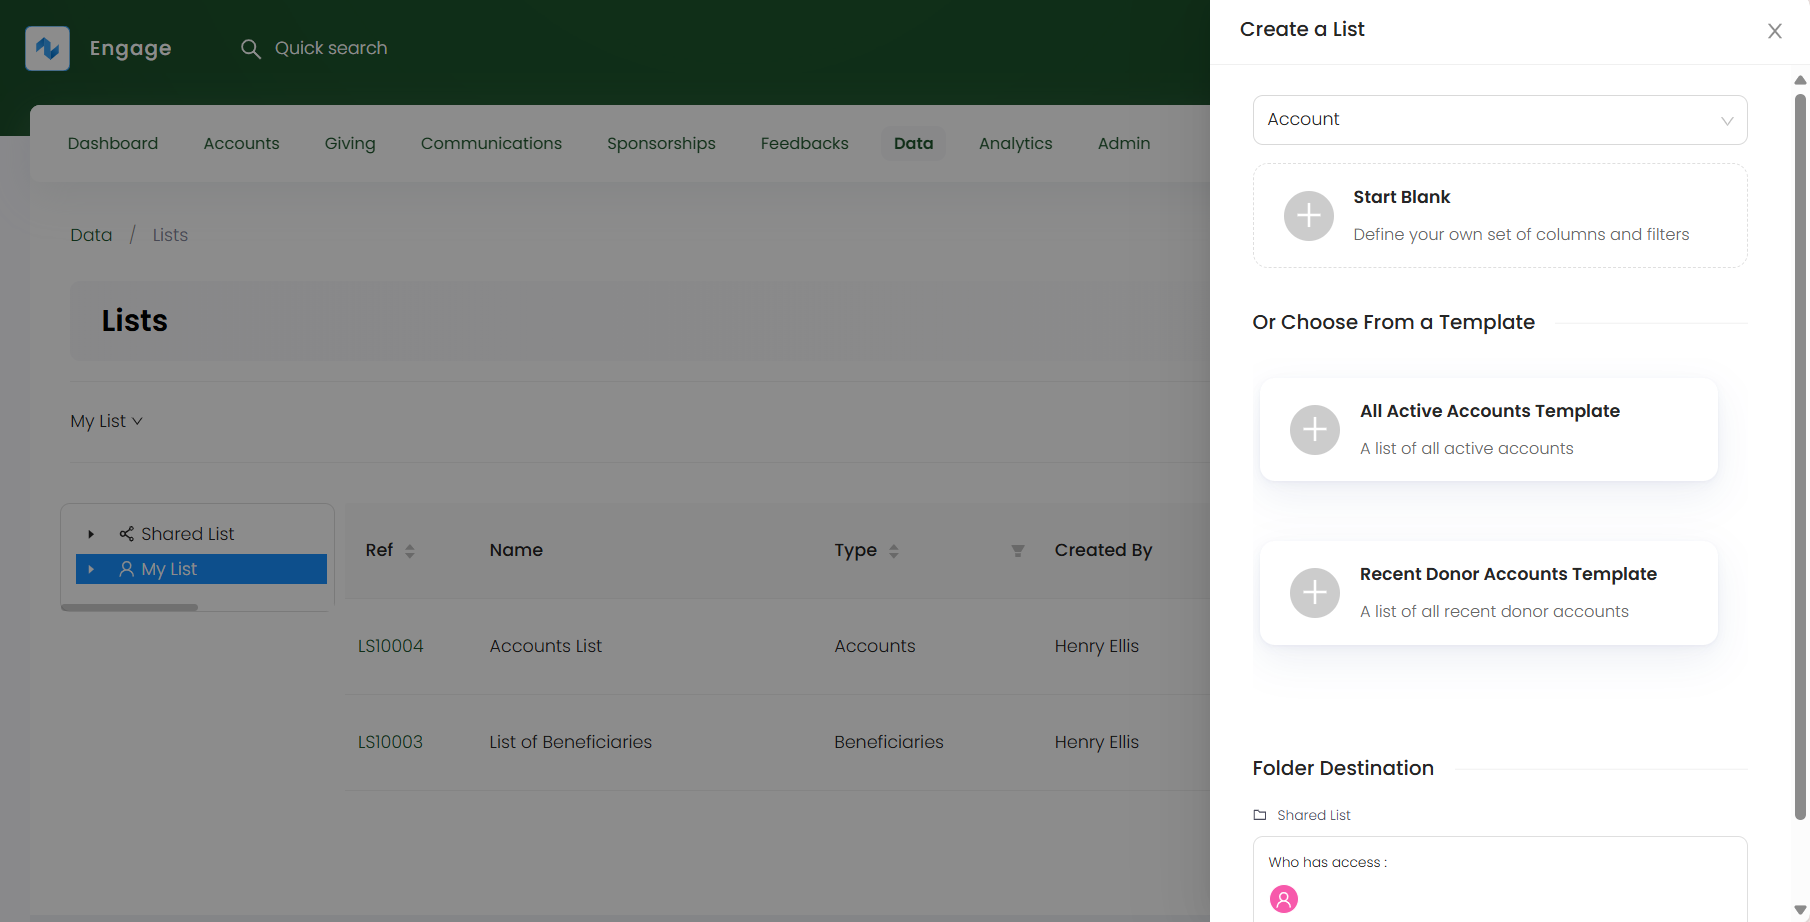
3. In the Create a List popup side panel, select the type of data you want to export in a particular list such as accounts. Choose whether to:
- Start blank by defining your own set of columns and filters.
- Start from a template predefined by N3O according to the data selected.
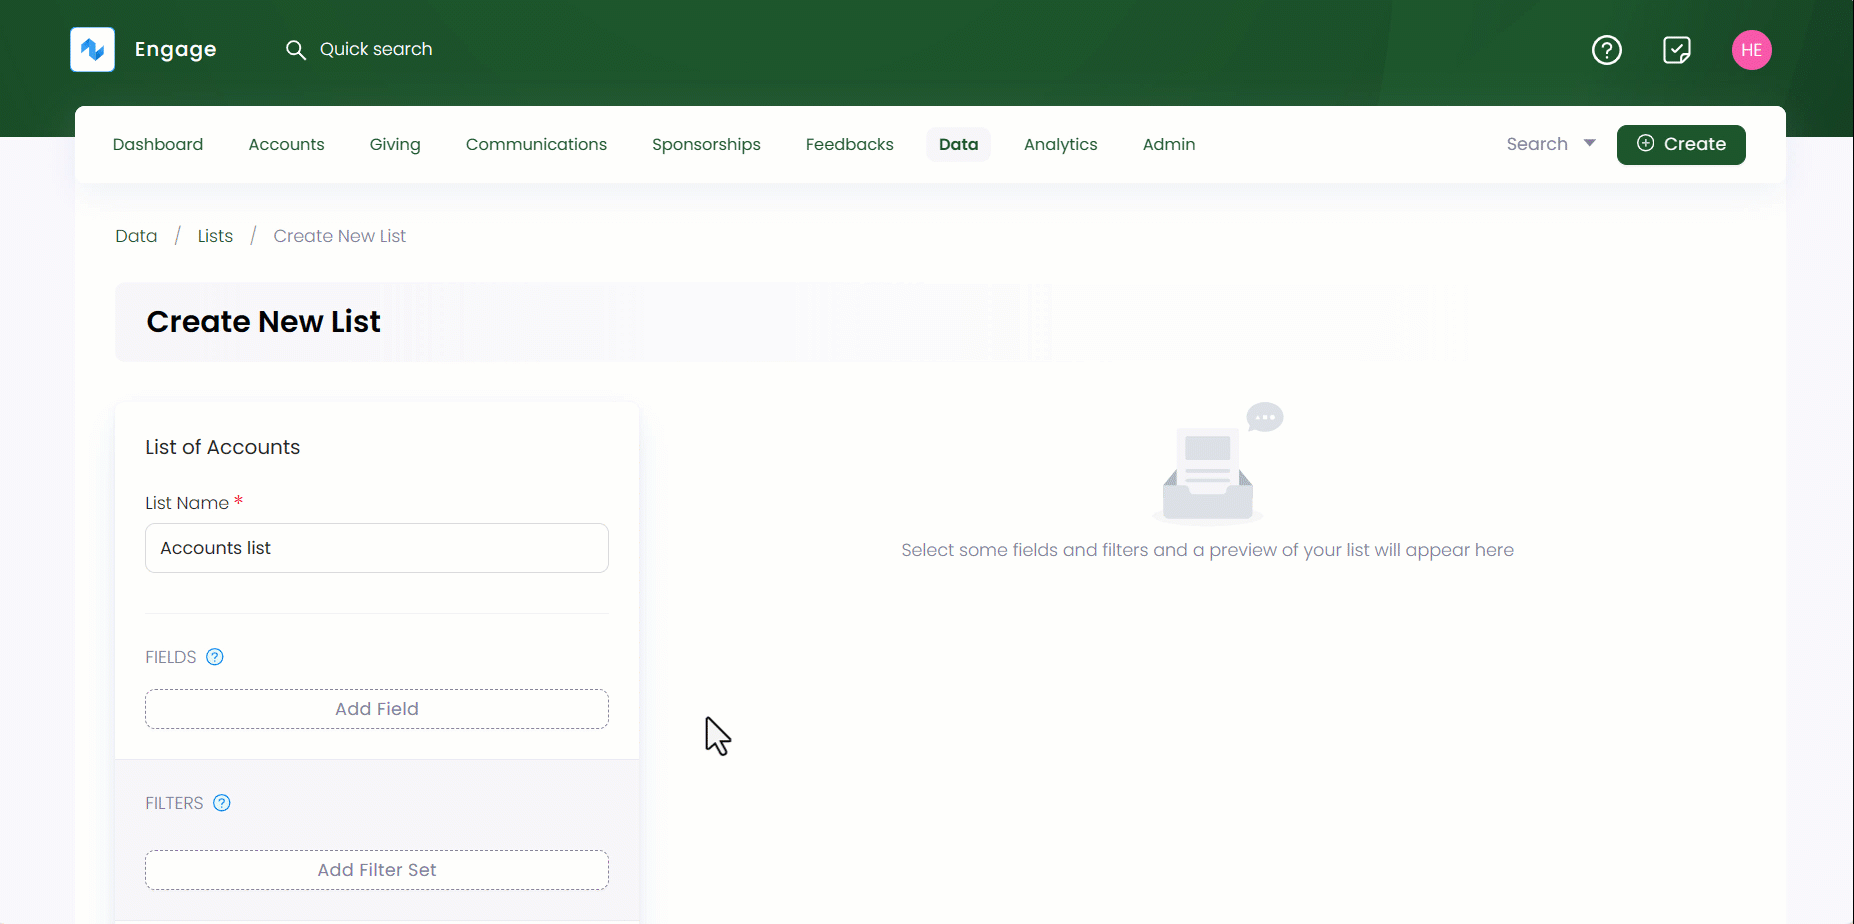
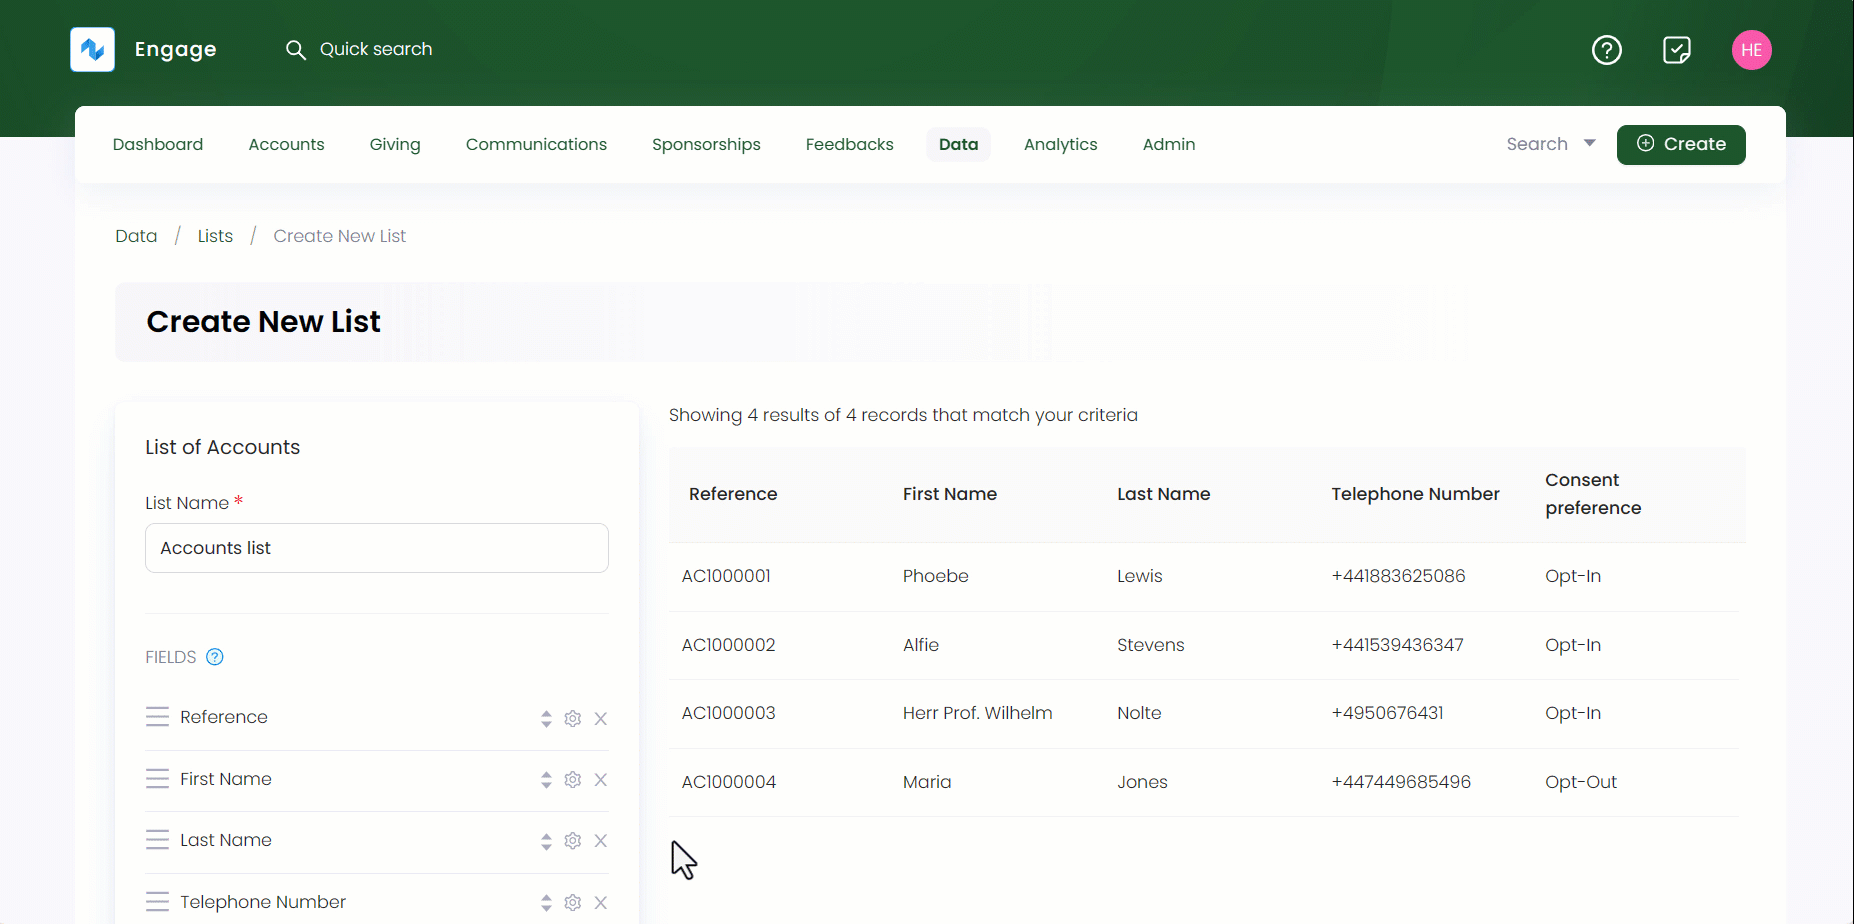
4. Selecting the list type redirects you to that particular lists Create New List screen. In the List of Data type section, input the List Name.
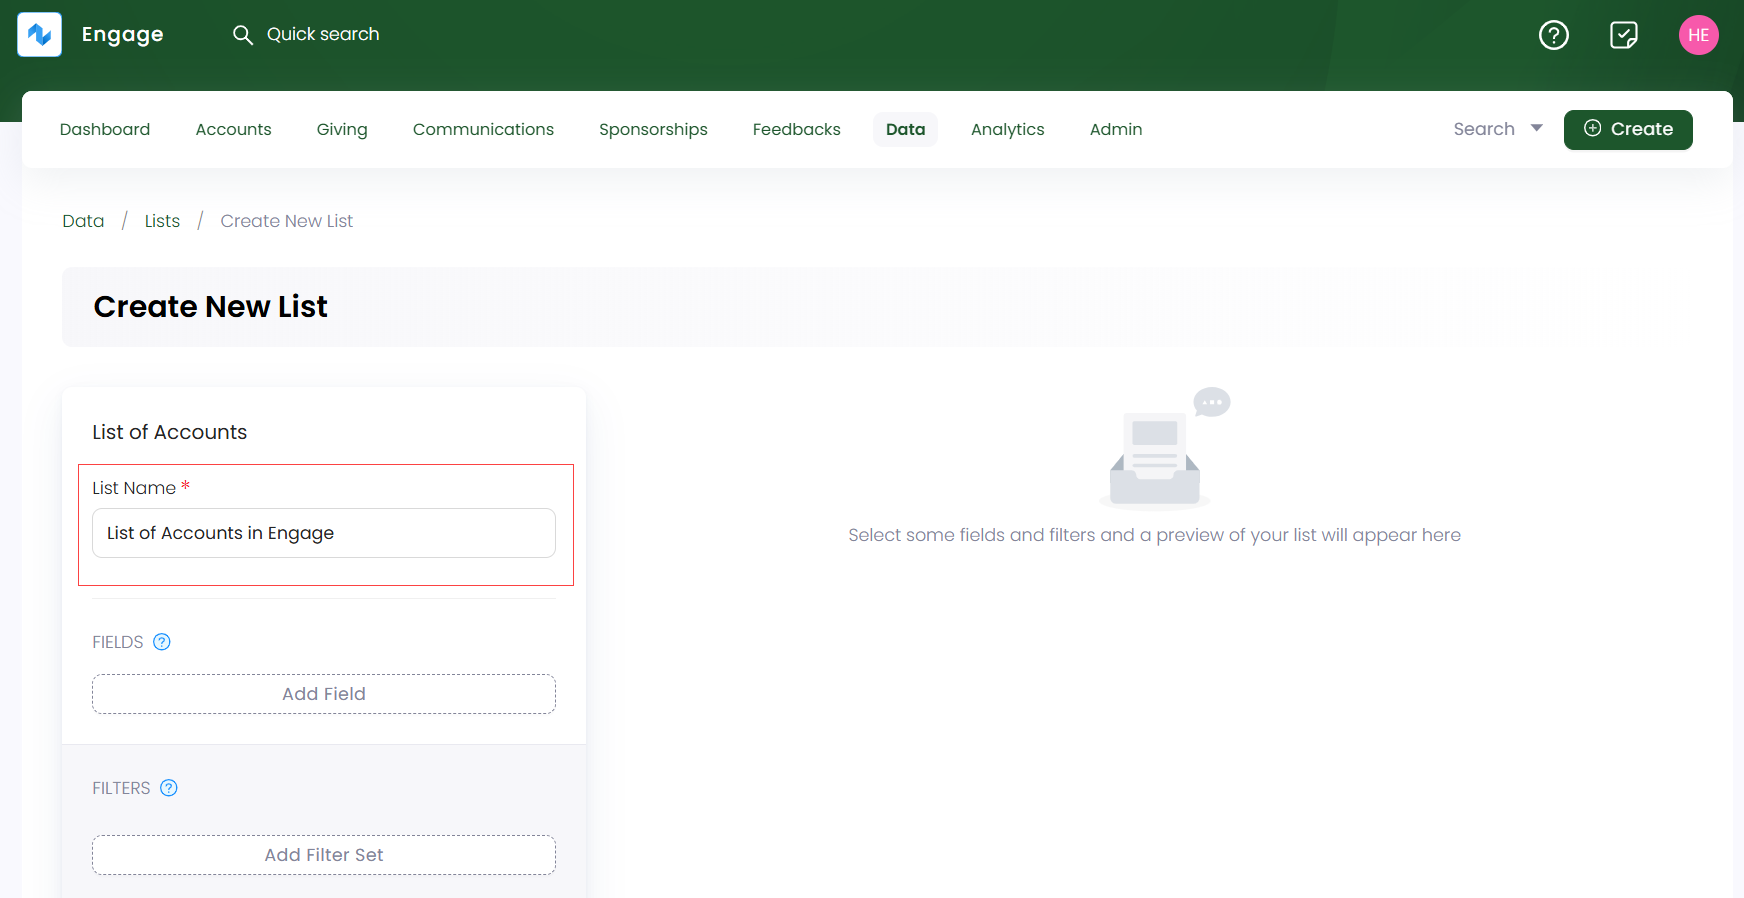
- Click Add Field to add different fields to the list which represents the actual data you wish to see on the list. For e.g. in an accounts list, you need to add some major fields; reference, display name, primary telephone number and current preference. Some fields require additional data to be added e.g. current preference requires choosing the field channel + category and giving the consent whether to contact the account as yes, no or any.
- Each field set has a number of other parameters which can be displayed as per necessary e.g. address or postal code. You may need not add and display each of them separately in a list.
- Each field can be edited again via the settings icon.
- Fields once added can be removed from the field set via the "x" icon.
- While adding fields, results start appearing on the right automatically for each field set.
- Click Add Filter Set and then Add Filter to add filters to the selected fields of the list, narrowing down the results appearing on the right. E.g. in an accounts list, you can add a filter on current preference and select the filter criteria as opt-in. Accounts who have opted in for the choosen preference will be displayed only.
It is not necessary to add filters for a field. You can always create a list without a filter set.
- Click + Create New List and a list of the data type chosen with fields and filter set will appear on the right.