Dashboard
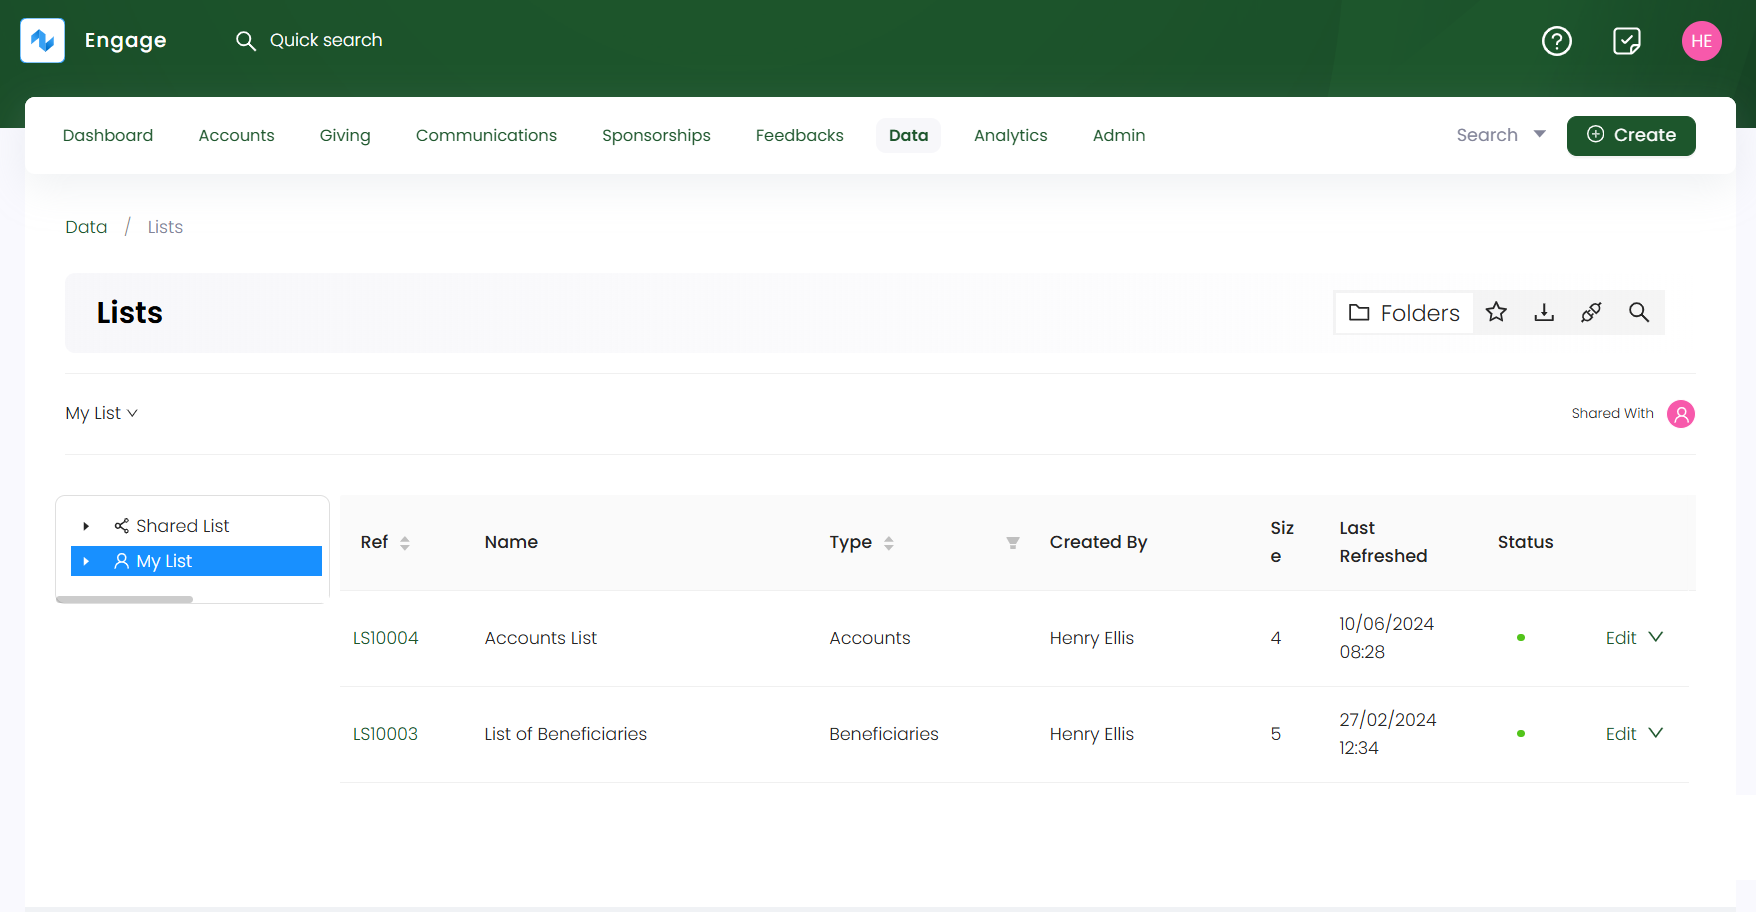
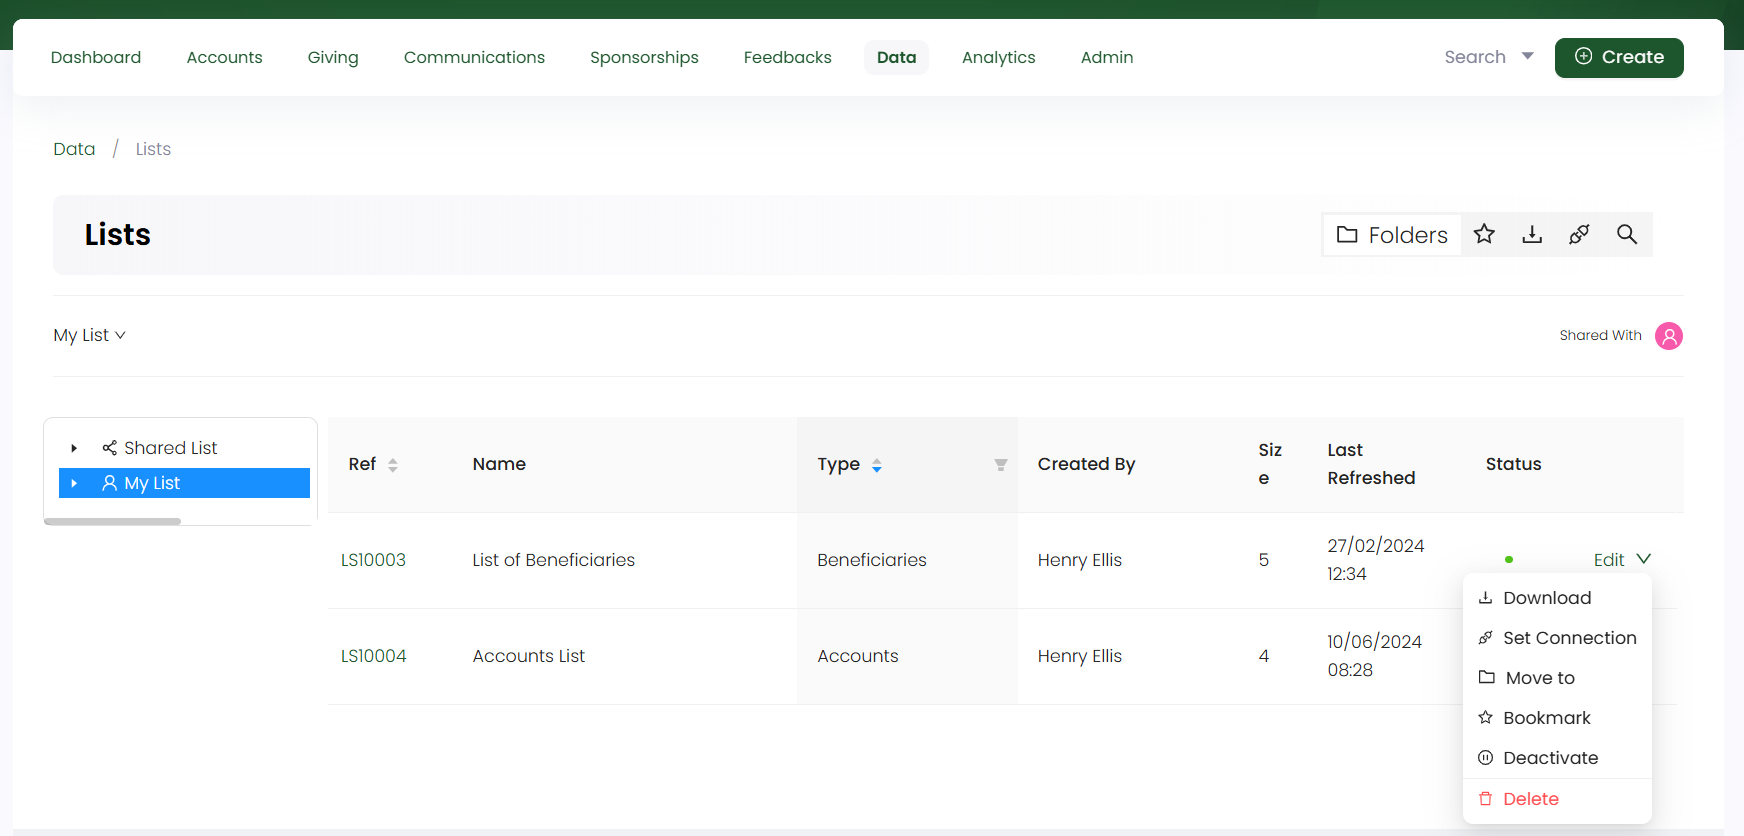
To land onto the lists dashboard, click Data in the top menu bar and then Lists in the quick navigation section. It consists of a record of all new lists created or any existing ones in their respective folders.
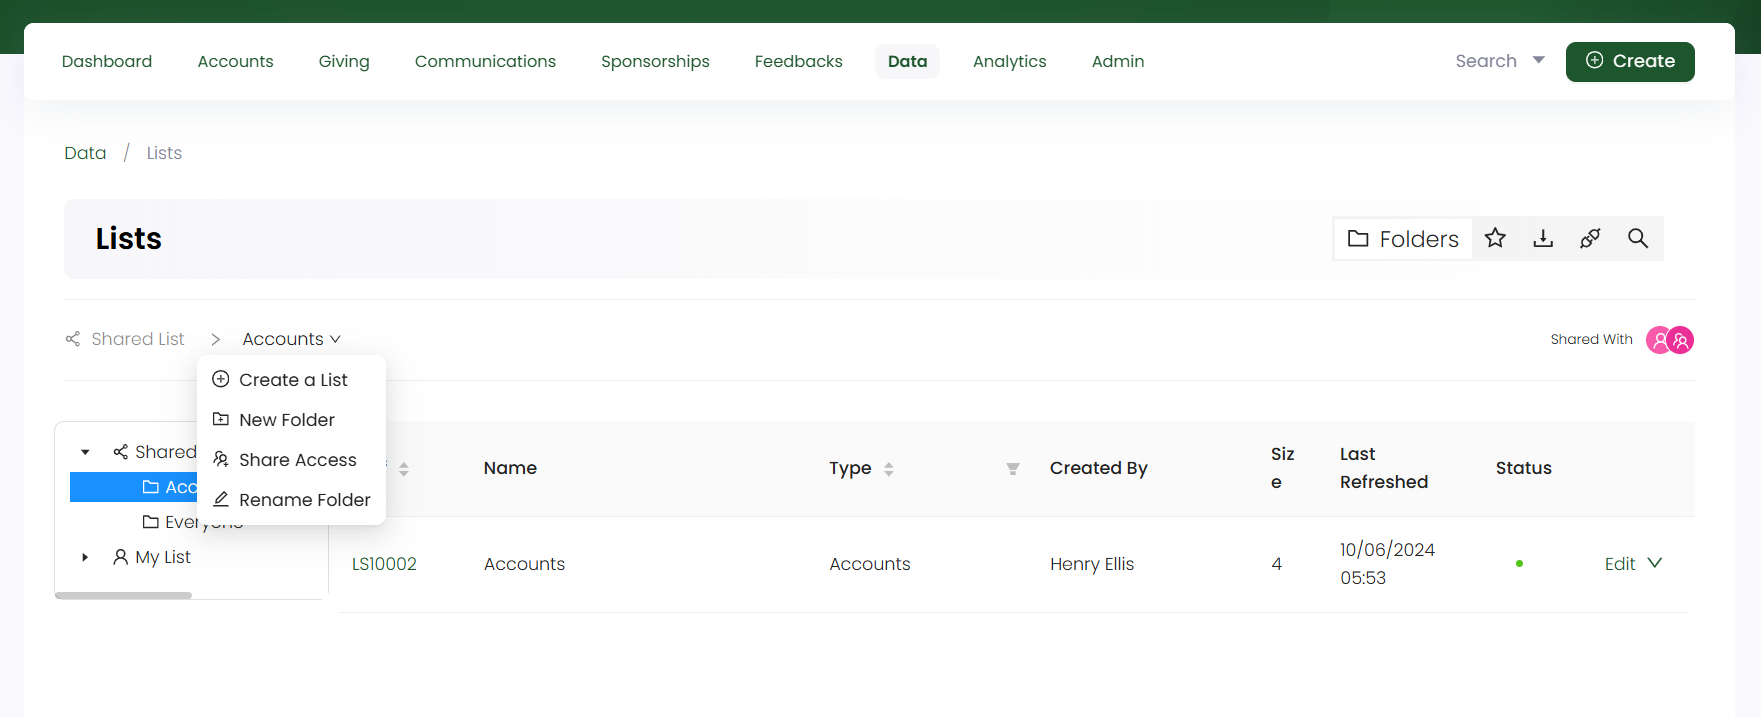
Folder Structure for Lists
Lists in Engage, are now created and placed within a folder structure on the dashboard. A folder structure reduces clutter and provides an opportunity to display different resources in one place. The lists dashboard shows two types of predefined folders for each user:
- My list folder: Contains all those lists that are for the user only.
- Shared list folder: Contains all those lists that are shared within the organization or everyone.
Each list created under these folders can be seen in the form of a table with the following parameters.
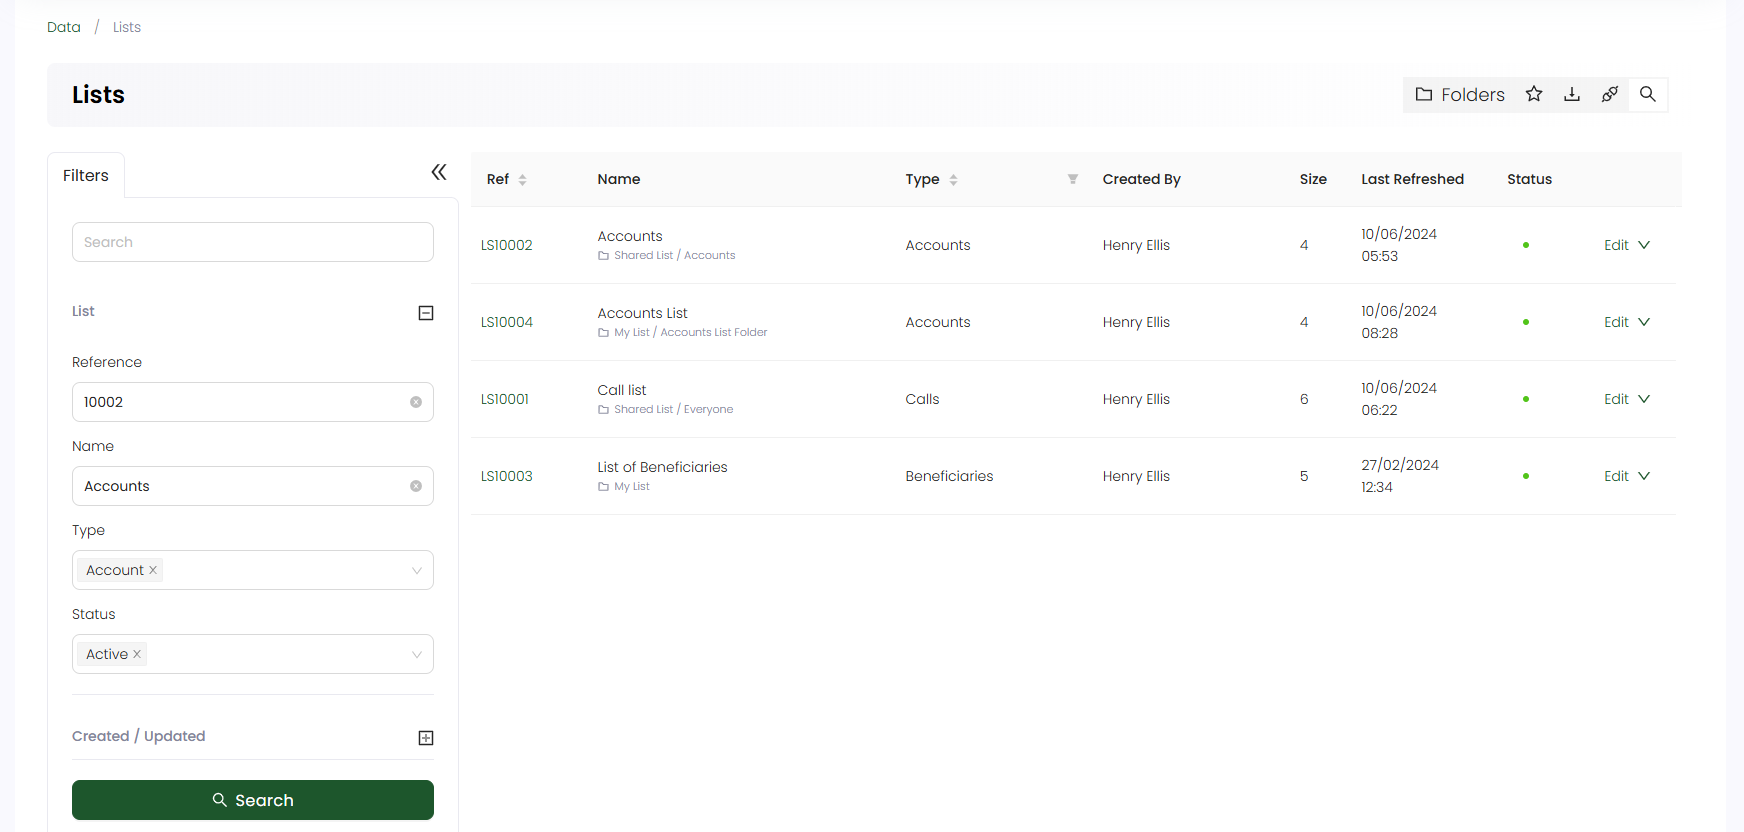
| Lists Parameters | Description |
|---|---|
| Reference | Reference number of the list created. |
| Name | Name of the list. |
| Type | Type of list created e.g. accounts, beneficiaries or payments list. |
| Created by | Name of the user who created the list. |
| Size | Number of records in a single list. |
| Last Refreshed | The date and time when a list was last refreshed. |
| Status | Status of a list as active or not active. |
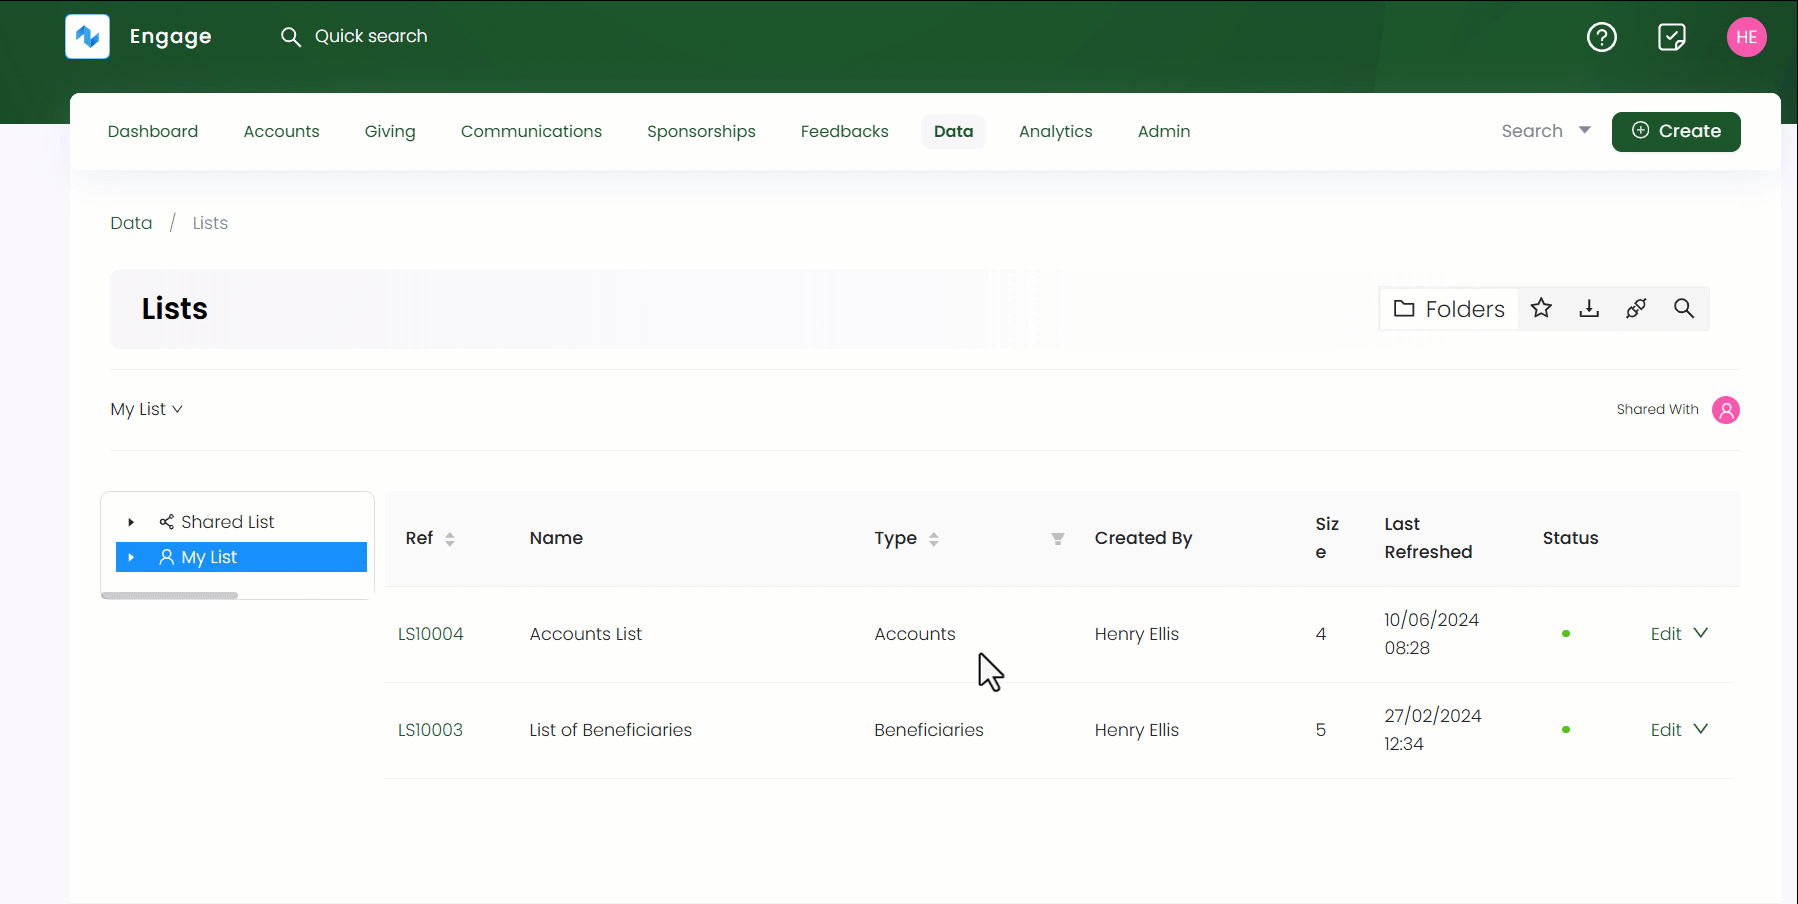
You can also use filters on parameters, like Type, to view a list of a certain type.
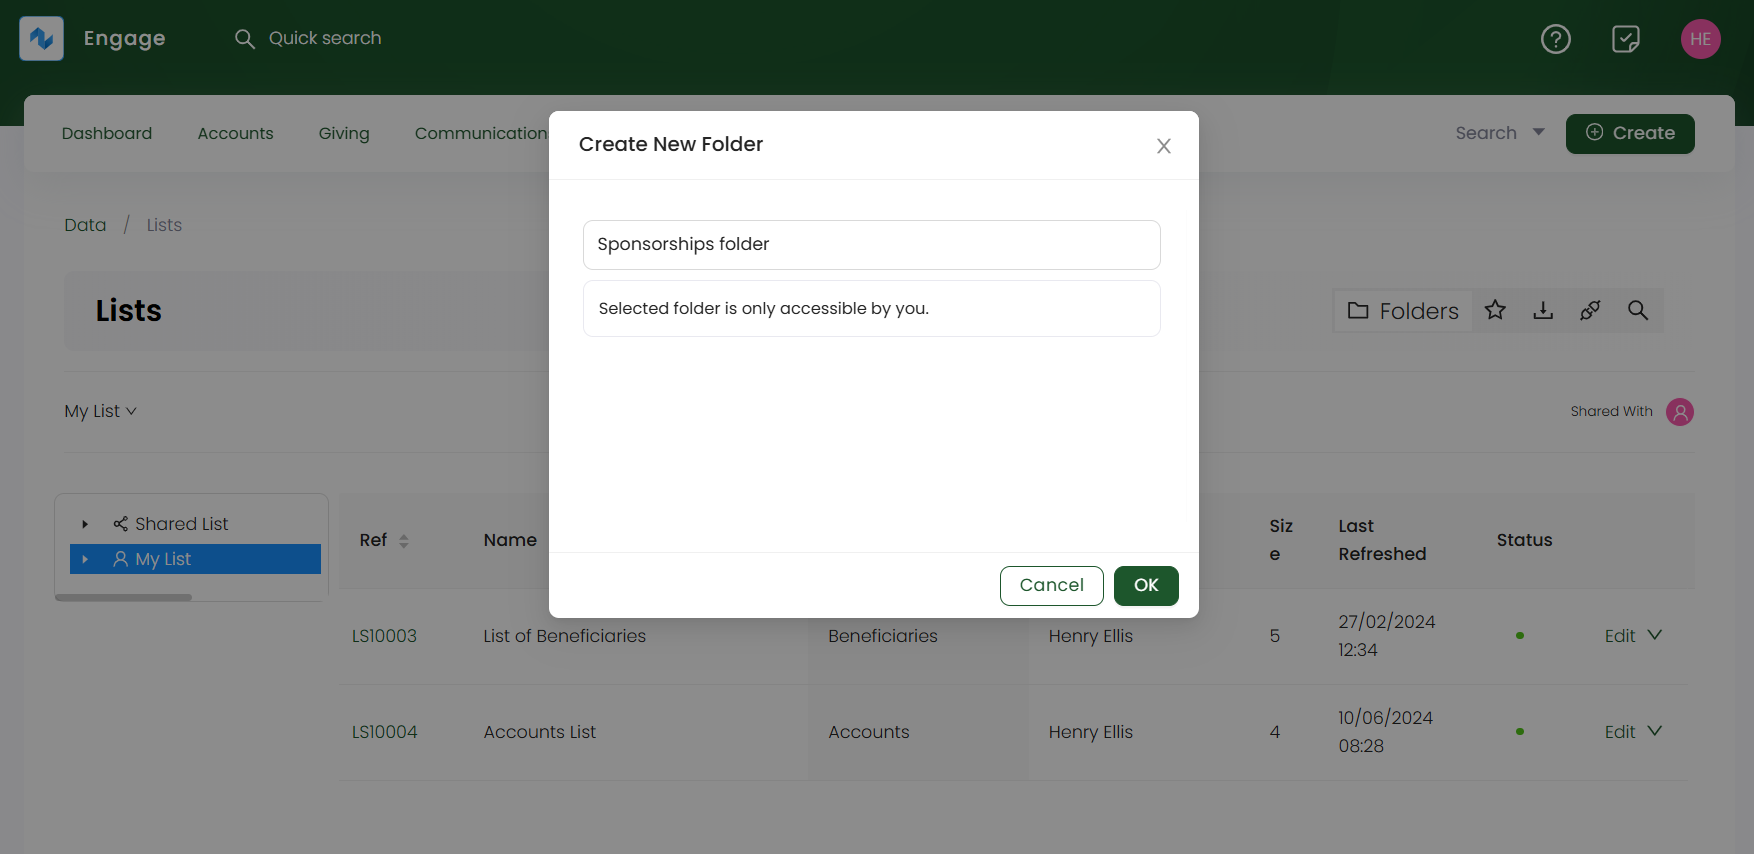
Creating SubFolders under a Folder
You can create subfolders under a single folder to differentiate lists from one another. For example, My List folder may include an accounts, sponsorships or payments folder to place their unique lists within.
1. Click on the folder in the folder section and hover over its name written on the top left.
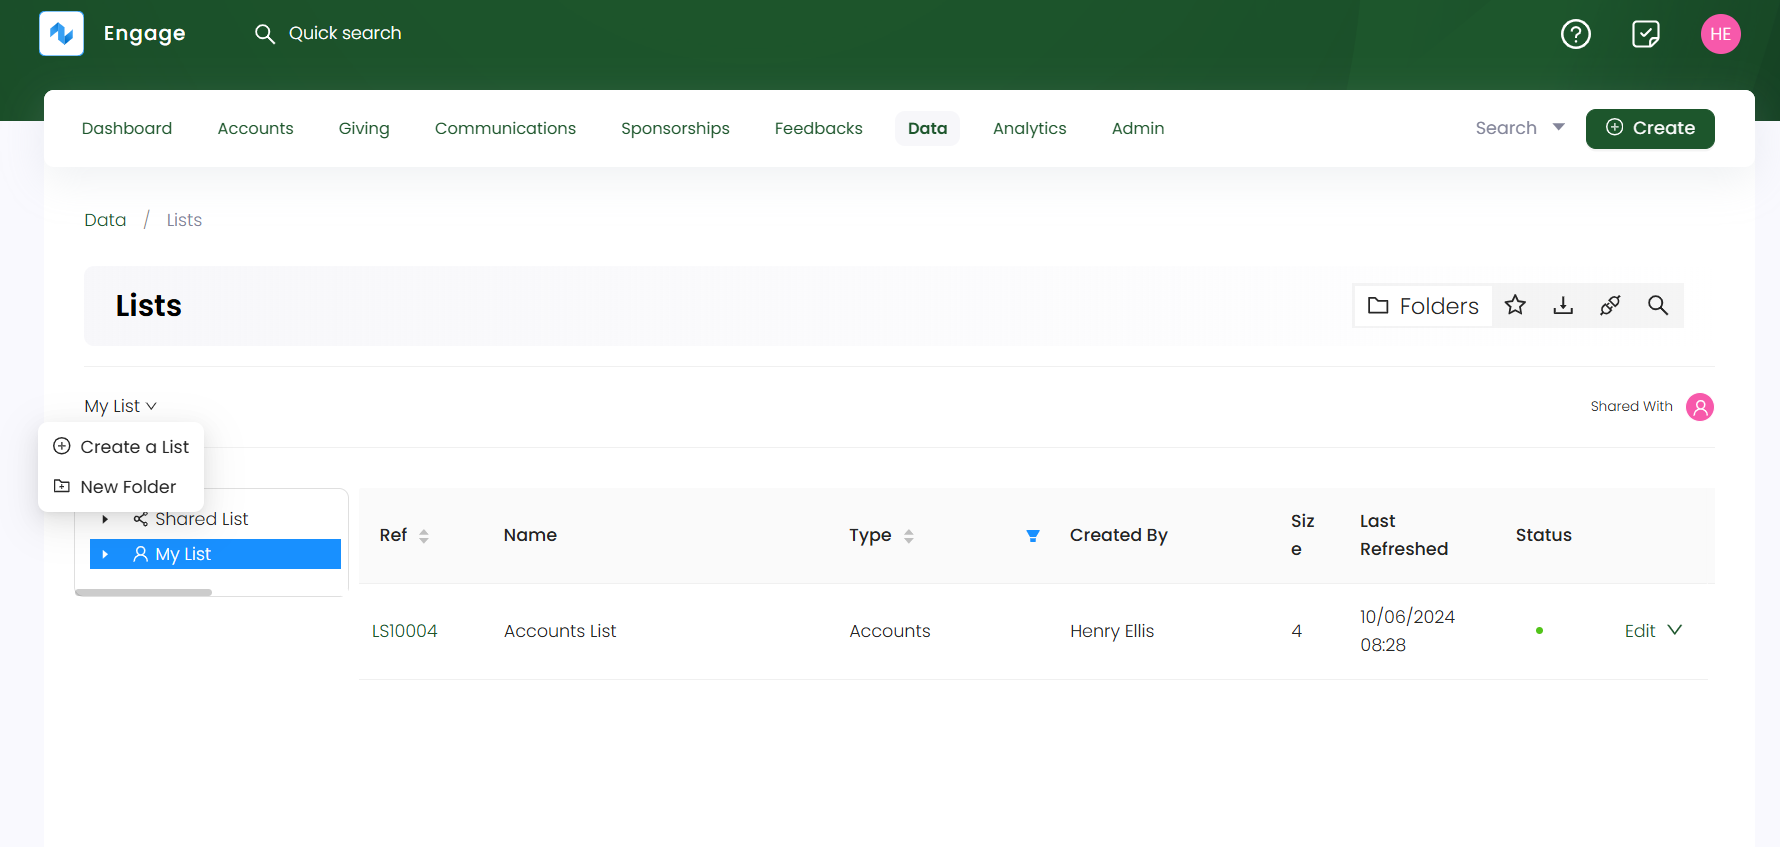
2. Select New Folder, input the folder name, and click OK. The folders description can also be viewed separately.
Perform Quick Functions for a List
Multiple quick functions can be performed for each list created on the dashboard. For example, bookmarking or deleting a list.
1. Select any list and click the down arrow at the end of that list.
2. You will find the following options:
- Download: Download the list in
CSVorExcelformat. - Set Connection: Set up a connection for the list. This option appears only when the list is not connected before.
- Move to: Move the list from one existing subfolders to another within My List and Shared List folders respectively.
- Bookmark: Bookmark a list for quick access.
- Deactivate: Deactivate a list if no longer in use.
- Delete: Delete a list if no longer needed.
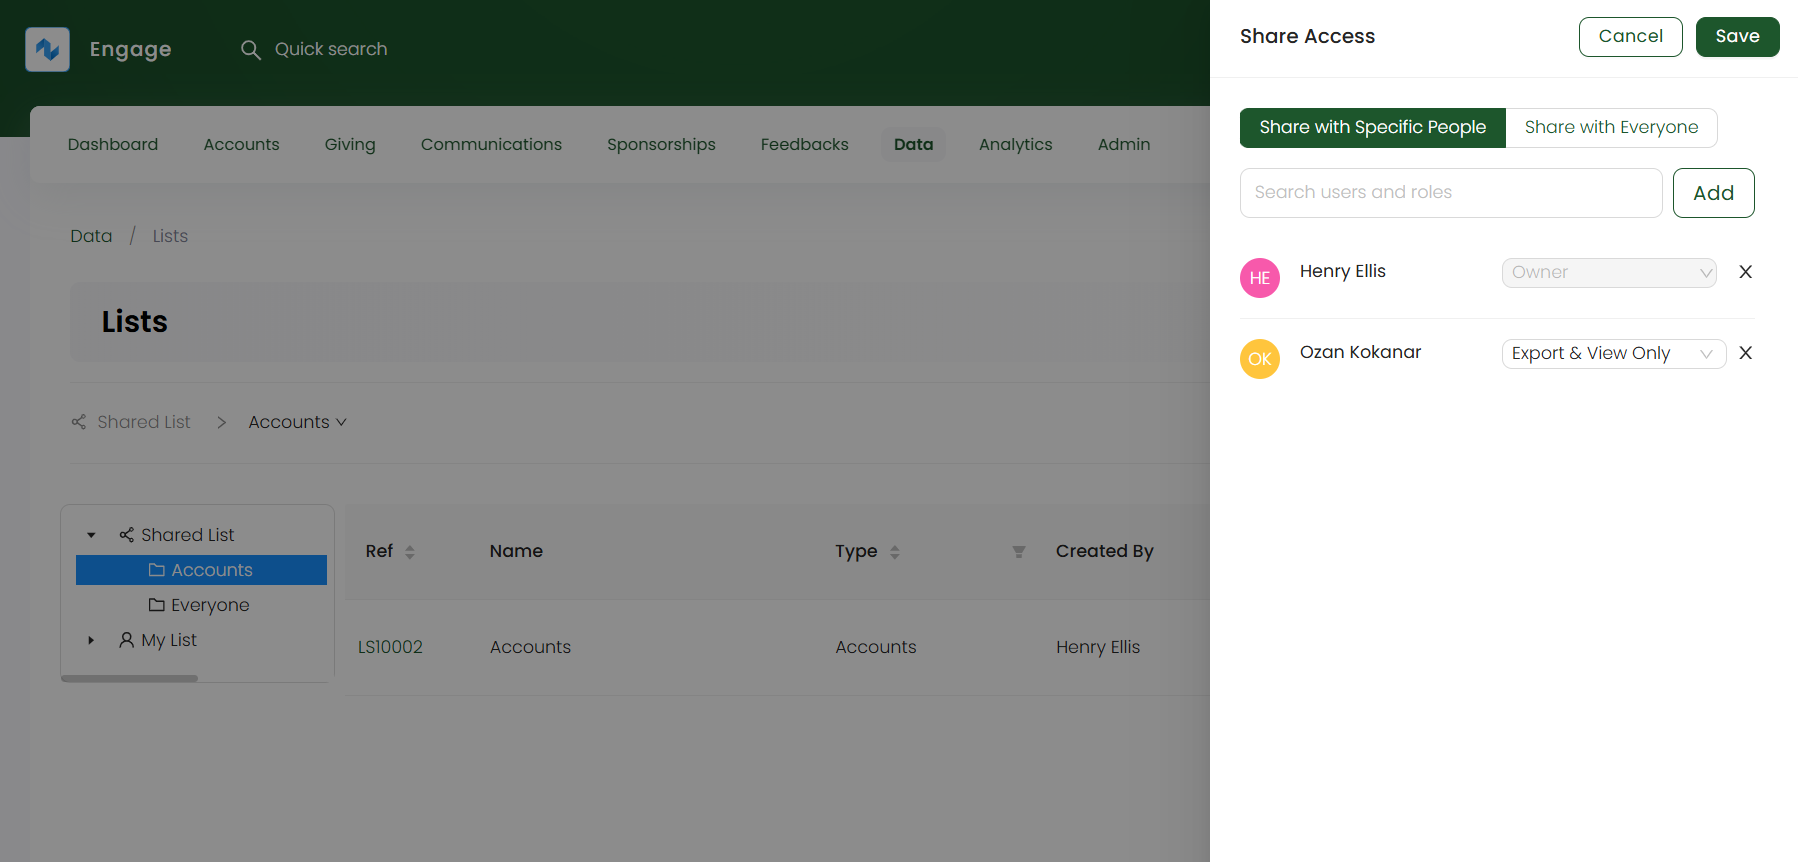
Provide Access for Shared Lists
Shared lists can provide access to other team members within the organization for combined collaboration and work. This access can be for a few people or everyone instead.
1. Select a folder within the Shared List, click the down arrow next to it and choose Share Access.
2. In the Share Access side panel, choose to share with specific people or everyone.
3. Search for the users and click Add to add them. Either give them access to Export & View only or Can Modify (can view and edit the list). When all specified users are added, click Save.
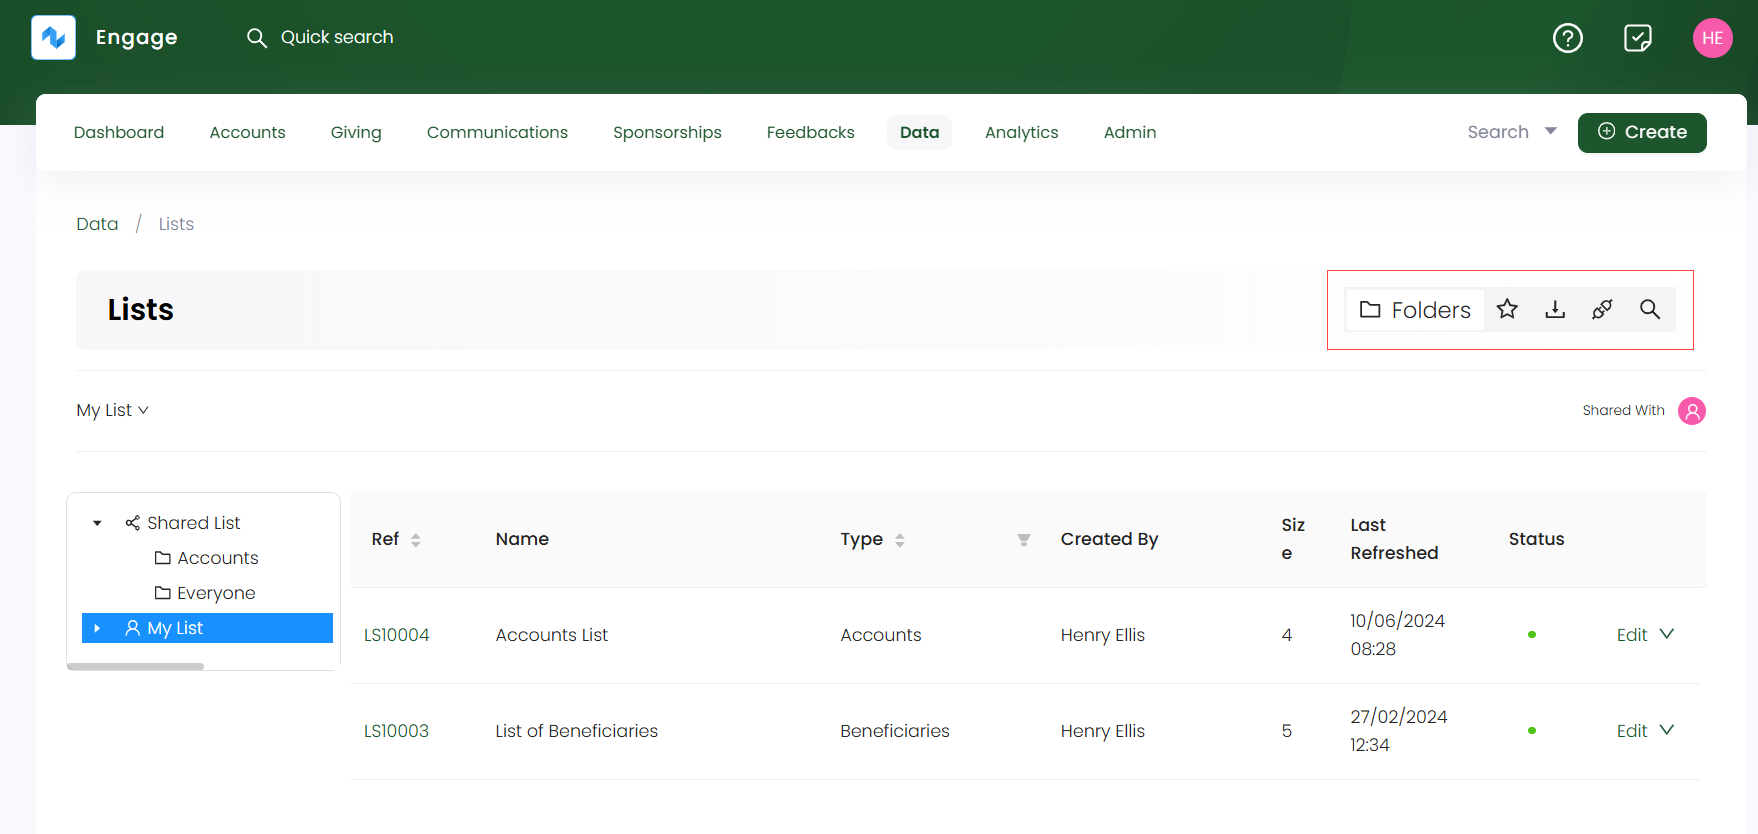
Quick Access to Multiple Pages from Dashboard
The lists dashboard provides a quick access sidebar to view different pages on one click. Click on any icon and navigate to the respective page. Icons include:
- Folders: takes you to the lists dashboard.
- Bookmarks: takes you to view the bookmarked lists. These bookmarked lists are personal to you and allow quick access to a specific list instead of searching it all over again. To bookmark a list, click the down arrow at the end of a list and select Bookmark.
- Downloads: takes you to view the downloaded lists.
- Connections: takes you to the connections page.
- Search: takes you to search for a specific list.
Discussing the List Search Option
1. Click on the Search icon in the quick access sidebar to view the search screen.
2. The list search screen is made up of a Filters panel on the left which you can collapse, and a results panel on the right.
3. In the Filters panel, you can modify the search by specifying input parameters accordingly. For example, click the + icon next to List. You will see a list of parameters including:
- Reference and Name: Input the reference and name of the list.
- Type: Choose the type of list.
- Status: Select the status of the list.
For the Created/Updated search option, you can specify only the From Date or the To Date and do not need to specify both.
4. Click the Search button and the results are loaded "one page" at a time on the right. To get further results, use a Load More button at the bottom of the result list. If you wish to remove the search input for all parameters and start all over again, use the Reset All option.