Sync SendGrid Event Data Within Engage
Twilio SendGrid is a cloud-based email delivery platform that allows businesses to reliably send transactional and marketing emails. But, sending an email is only a first step. You need to make sure that the email is sent to the right audience. Hence, Event Webhooks are used.
SendGrid Event Webhooks provide real-time notifications about events related to your email delivery. They allow you to track the success and engagement of your email campaigns or troubleshoot any delivery issues, etc. Therefore, organizations using a CRM, like Engage, integrate with SendGrid via webhooks to avail these features.
What are Event Webhooks and Types?
Terms 'webhooks' and 'event webhooks' are two different phenomena's. Webhooks refer to an overall API concept for an app to provide other applications with real-time information, whereas, event webhooks point to the SendGrid operation that makes POST requests to your URL. The URL you use to configure your SendGrid Event Webhook is referred to as the "Post URL," "endpoint," or "destination."
In SendGrid, event types refer to the type of events provided by the event webhooks in two major categories: deliverability events and engagement events.
- Deliverability events such as "delivered," "bounced," and "processed".
- Engagement events such as "unsubscribe," and "click".
Create a Webhook in Engage
Subscribers in SendGrid can also be accounts or donors within Engage. Any subscriber wanting to unsubscribe from receiving any email regarding fundraising or any other activity via SendGrid can at the same time opt out of the related contact preference within Engage using webhooks.
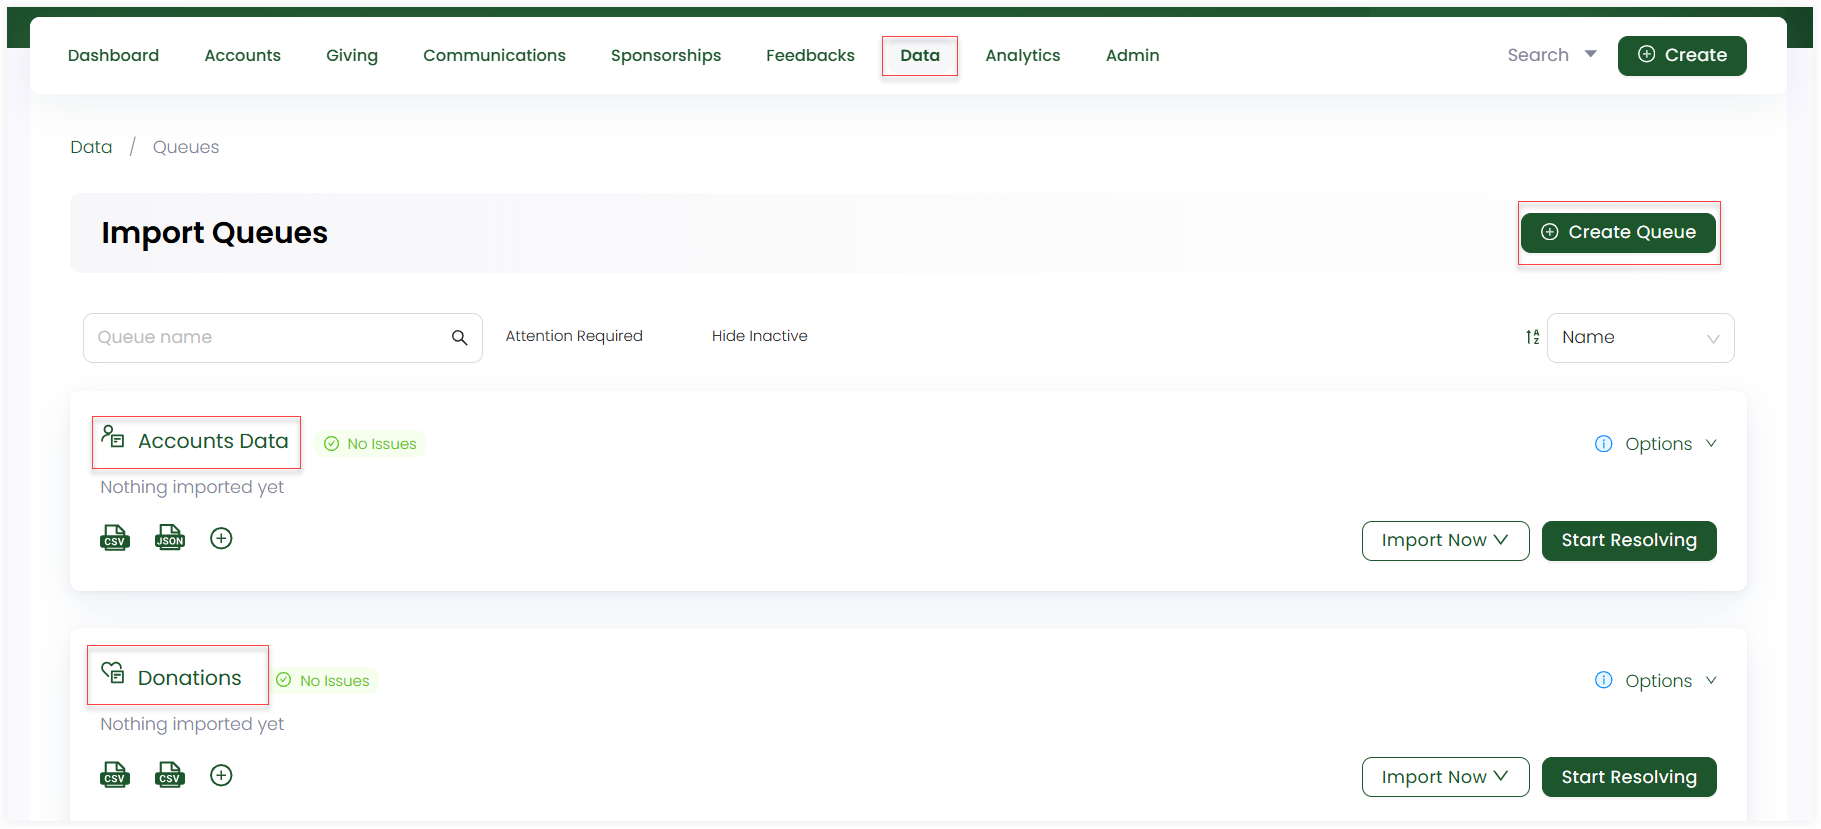
1. In Engage, click on Data, Imports and choose an existing Queue or create a new one..
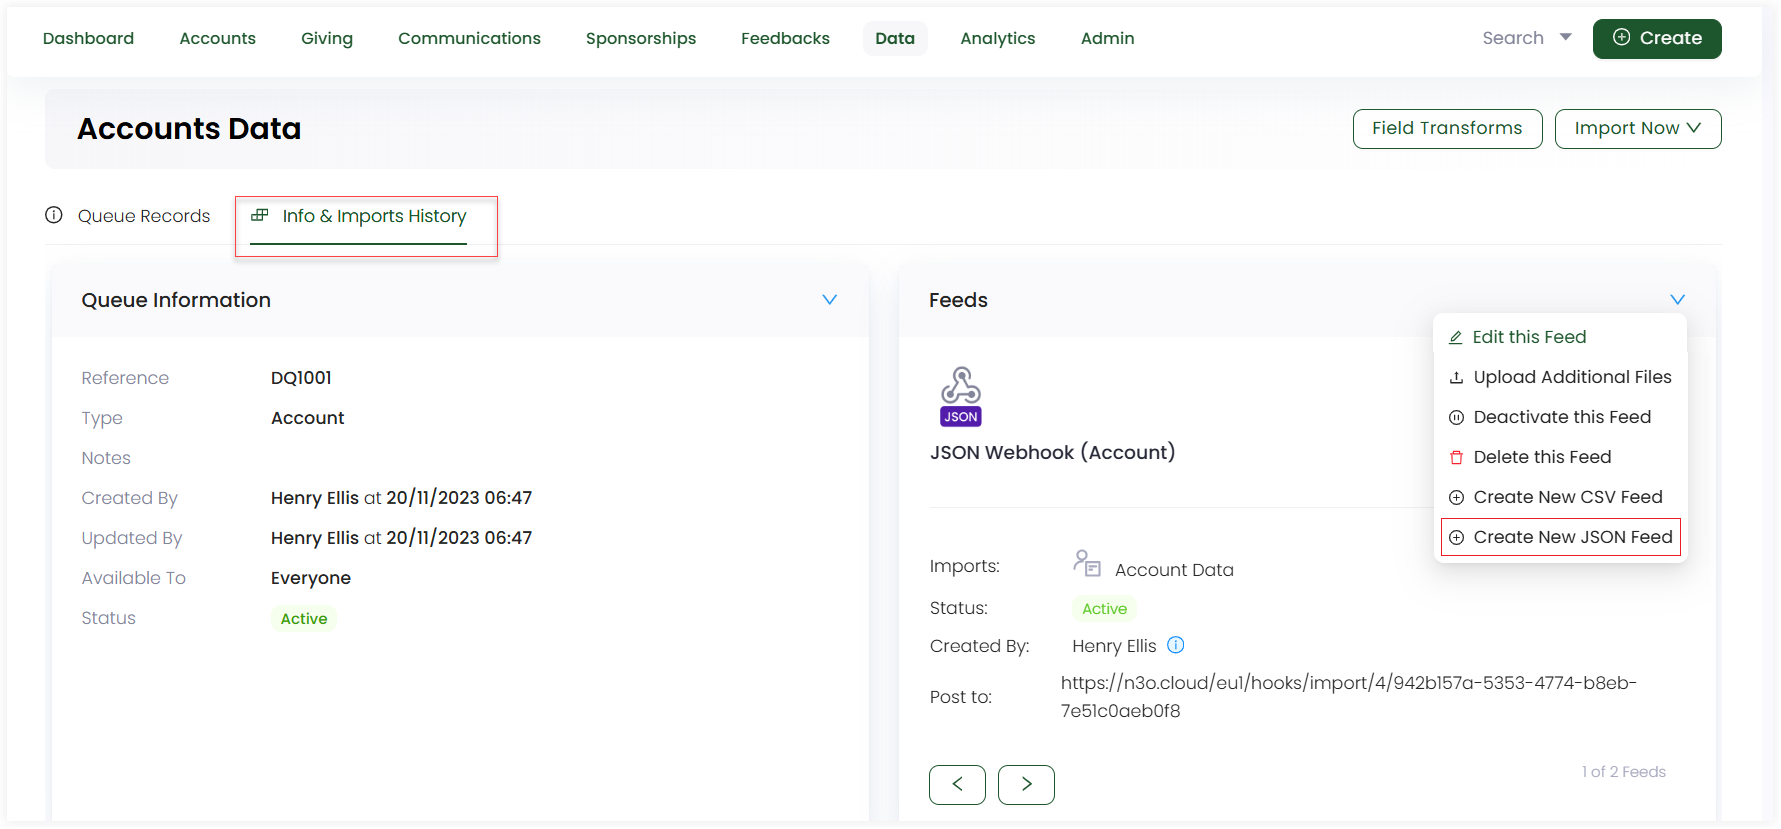
2. Open the Info & Imports History tab and under the Feeds section, hover over the down arrow and click Create New JSON Feed to create and set up a new JSON feed.
You can also ask your system administrator to set up feeds (webhooks) for you.
Add an Event Webhook in SendGrid
Once you have a webhook URL ready to accept SendGrid's POST requests, you can add an event webhook in SendGrid. To add a new event webhook to your account, follow the steps below.
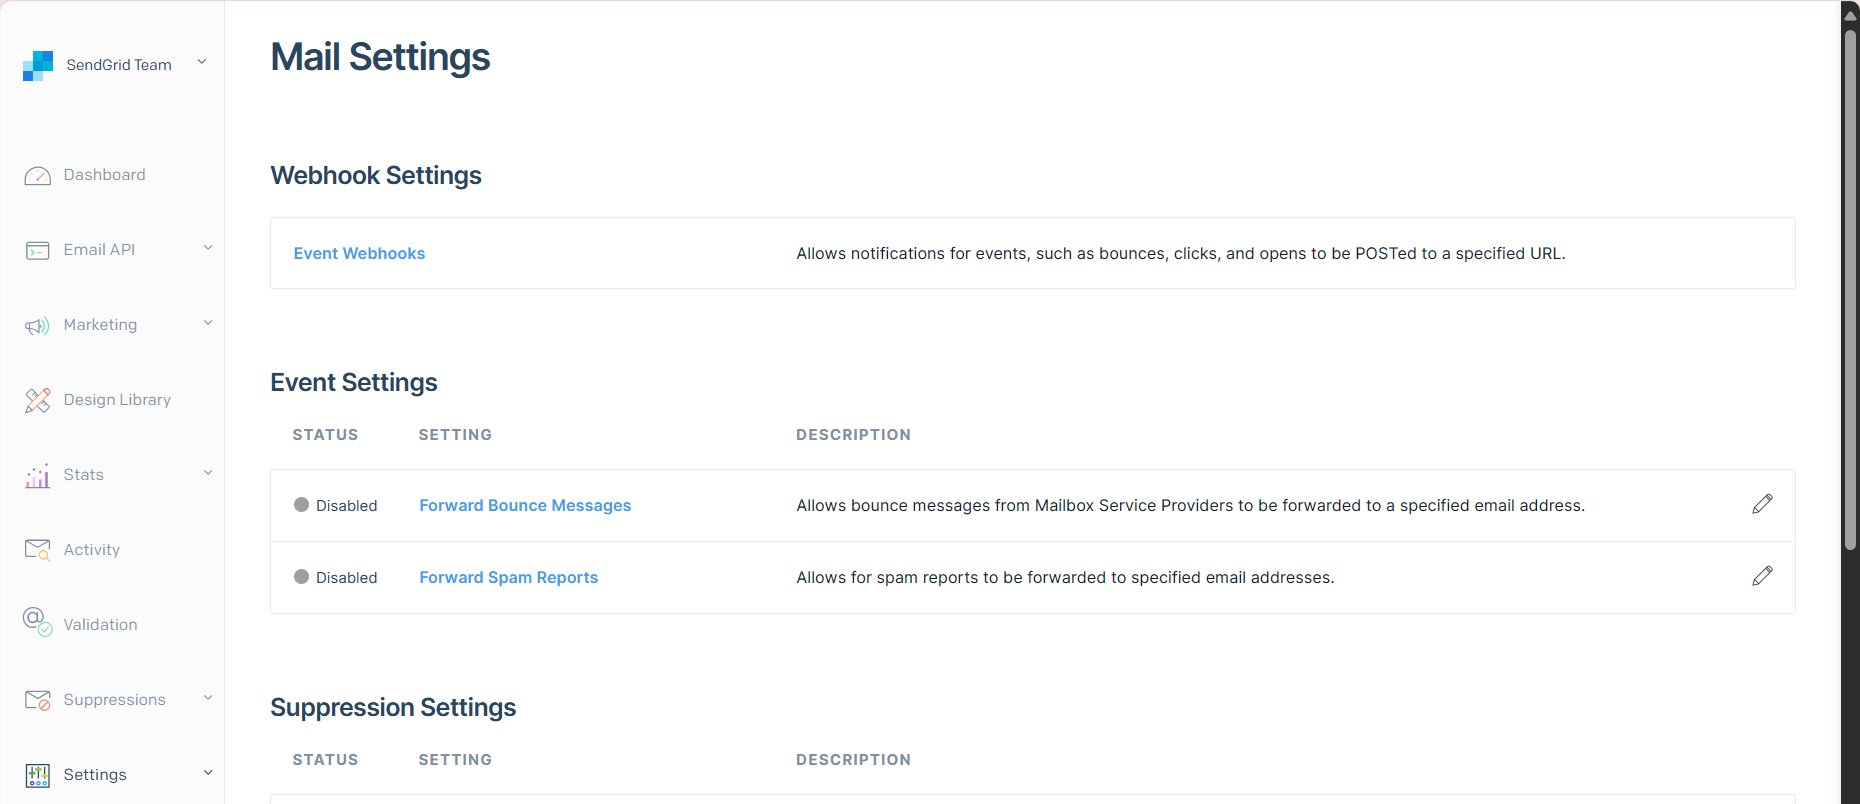
1. Login into your SendGrid account. In the SendGrid application UI, navigate to Settings and then Mail Settings.
2. Under Webhook Settings, click Event Webhooks.
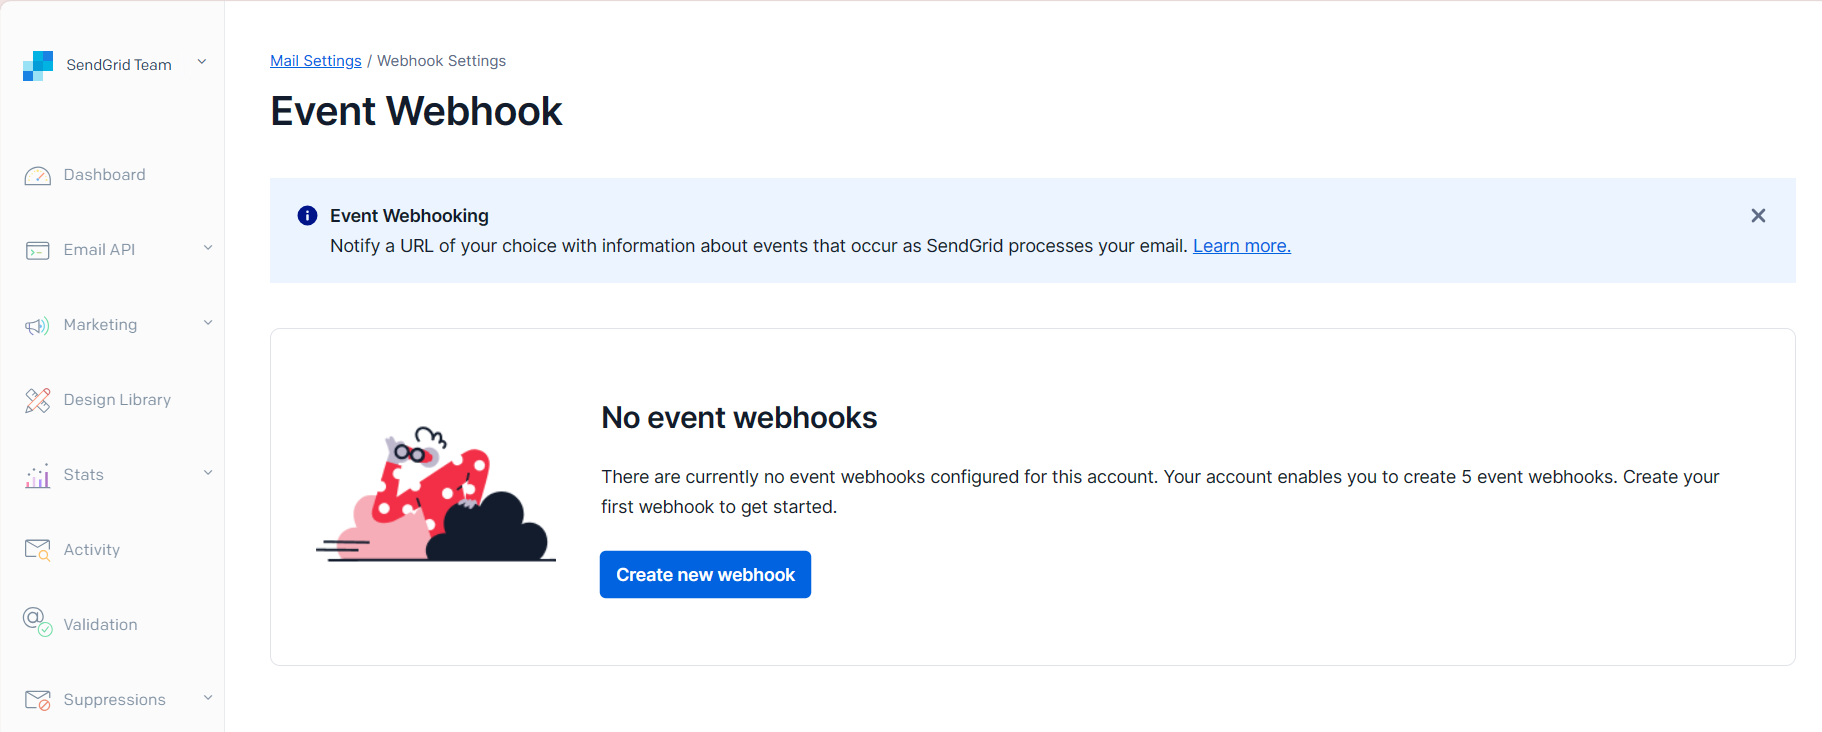
3. The Event Webhook settings page will load. Click Create new webhook. A dialog will open where you can configure the event webhook.
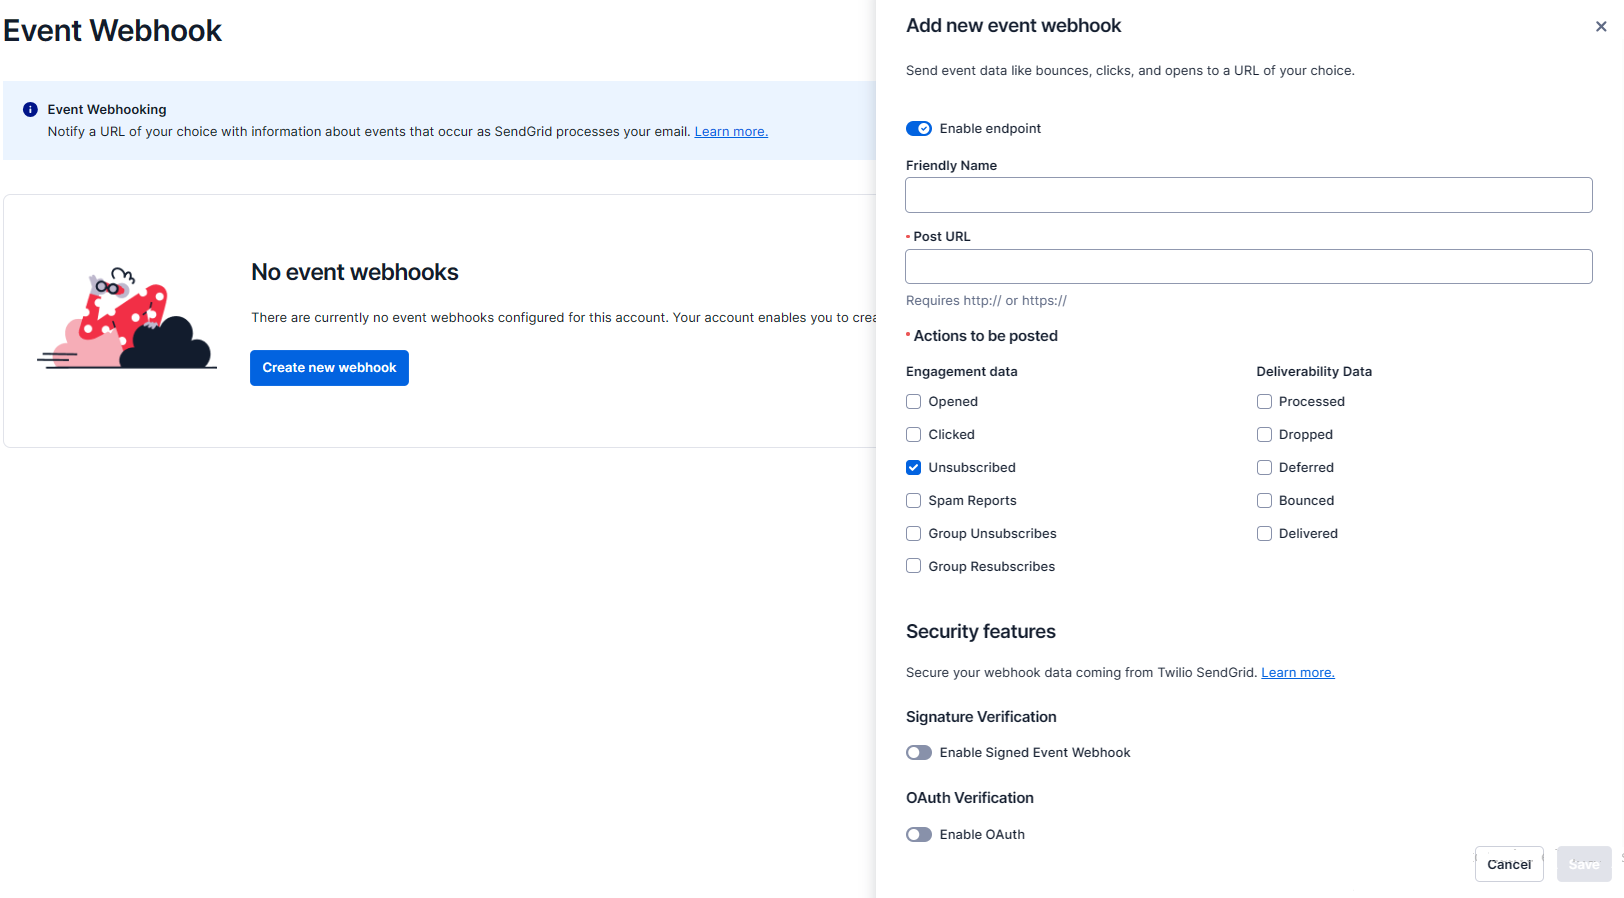
4. Populate the following fields according to the required information.
- Enable endpoint: Toggle the webhook to be active.
- Friendly Name: Add an optional name to help you differentiate among your webhooks.
- Post URL: Add the URL where the SendGrid should send data. This URL is the webhook URL that you created in Engage.
- Actions to be posted: Select the event types you would like to receive data about in each webhook request payload.
- Security features: See Getting Started with the Event Webhook Security Features for details about configuring the settings under this heading.
- Signature Verification: Toggle the Signed Event Webhook button as yes or no.
- OAuth Verification: Toggle the Enable OAuth button as yes or no.
5. Click Save to save the Event Webhook configuration.
Testing the Event Webhook
Now that you have created your first event webhook, it is time to test it. As soon as a subscriber unsubscribes from any email in SendGrid, Engage receives a webhook via the URL, finds the account (subscriber) by its Engage ID and sets the contact preference of emails for the fundraising section of that account to be off.
Unsubcription is the event type that you have choosen in the actions to be posted section while configuring the event webhook.