Creating a Scheduled Giving
To create a scheduled giving, go through the following steps.
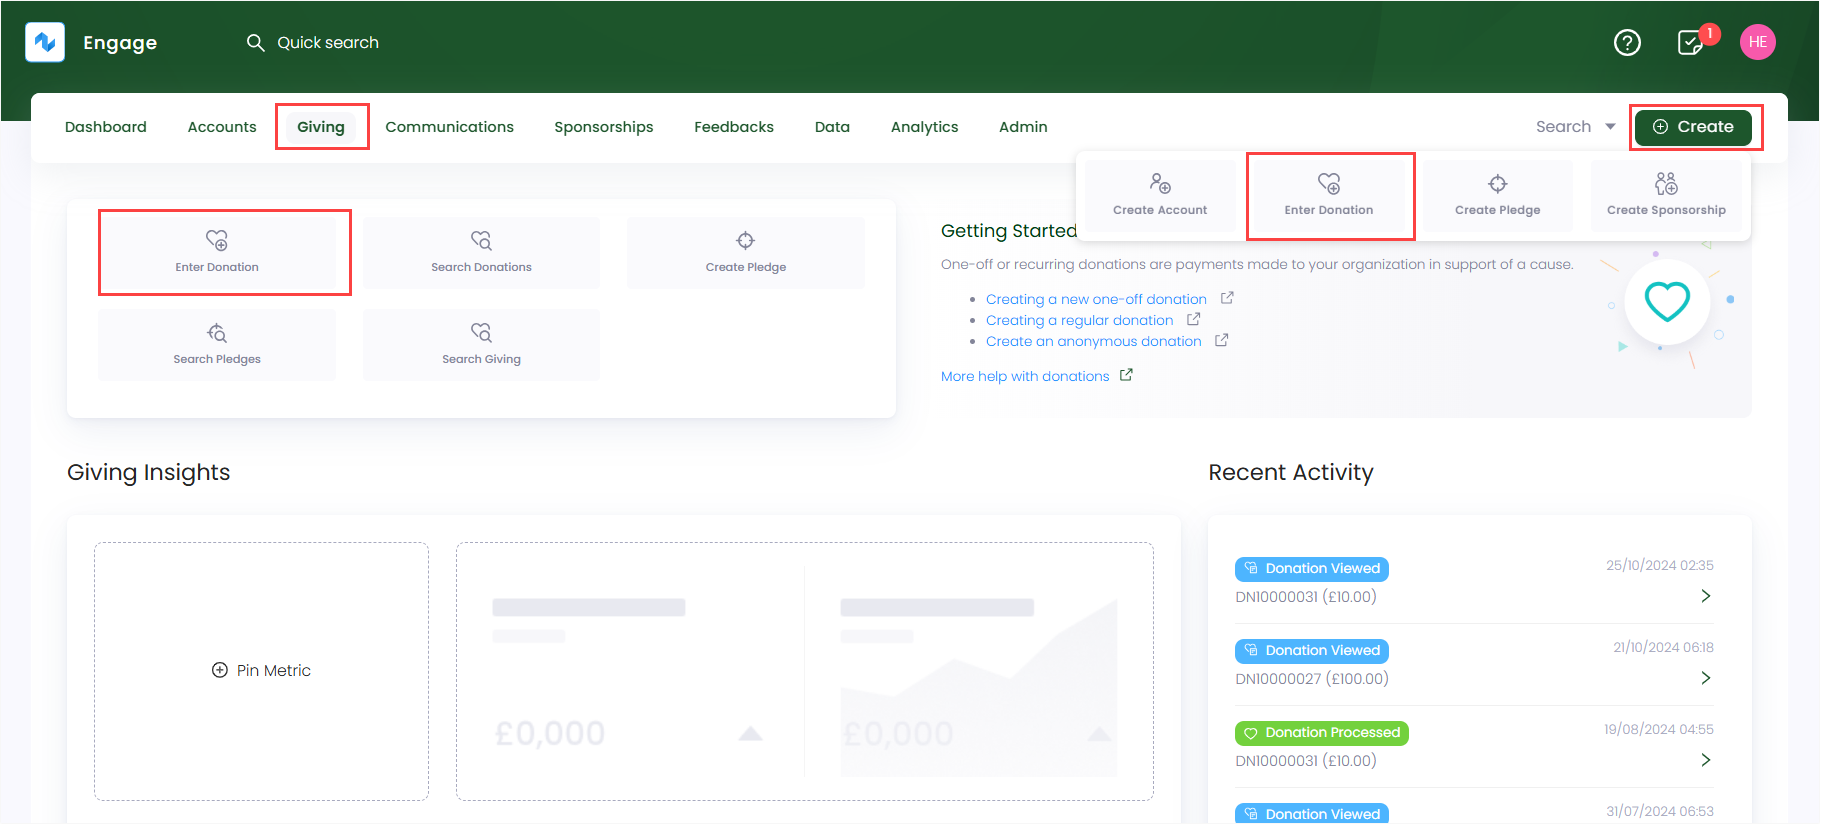
1. On the Giving dashboard, in the quick navigation box, click Enter Donation or use the Create button to enter donation.
- You can also search a specific account and create a scheduled giving for that account on its main profile page.
- Scheduled givings are not created as anonymous.
2. Search for an account on the left-hand side. This will take you to the account's Enter Donation screen.
3. Choose the type of donation, i.e., Scheduled Giving.
You can choose the currency you wish to donate in for e.g. GBP or EUR on the top right, but the default is set to GBP.
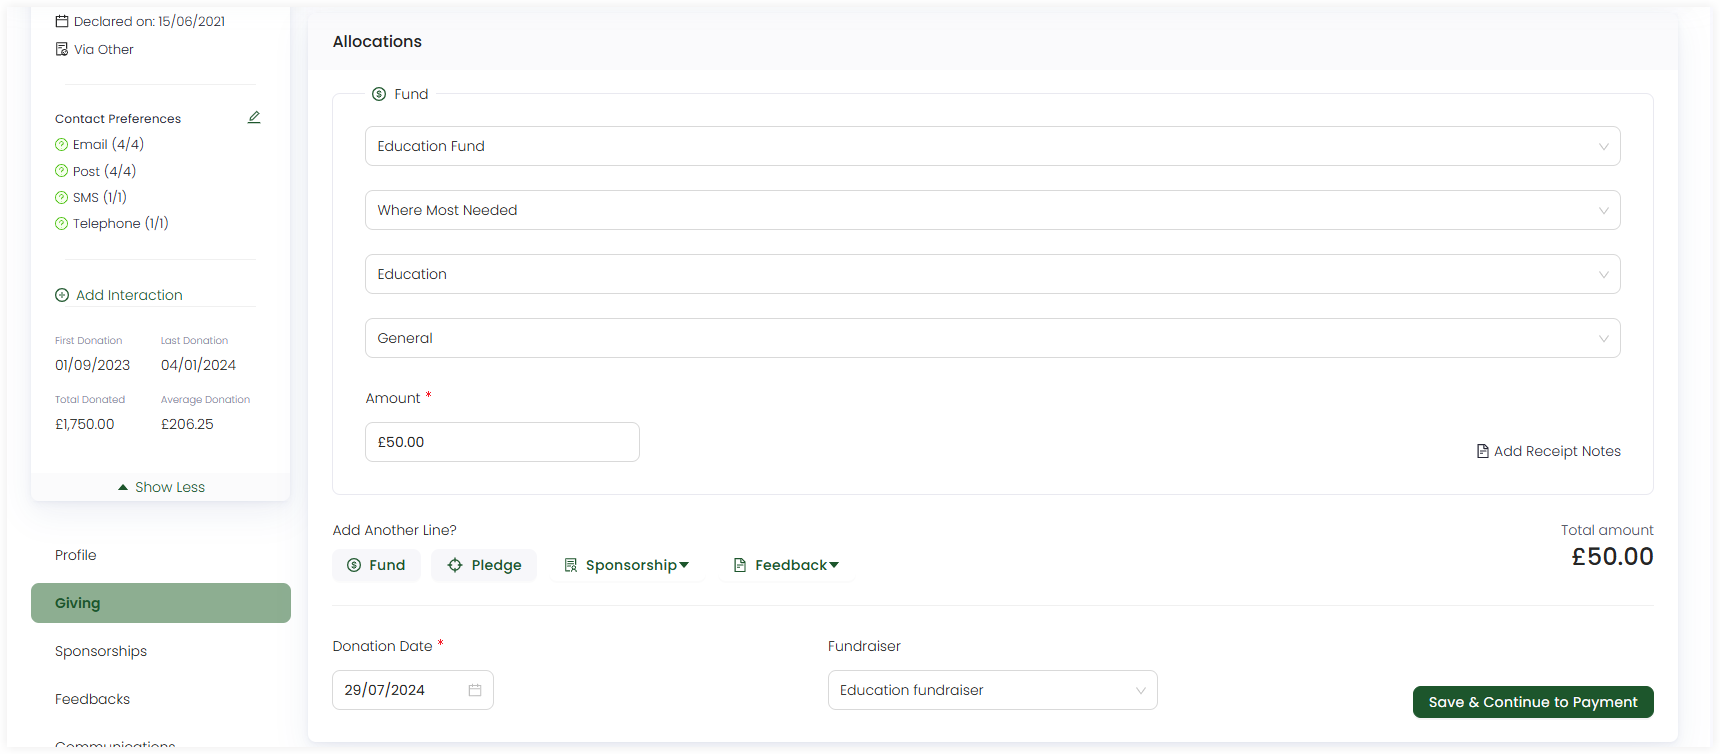
4. In the Allocations section, specify the allocation towards which you will be donating, e.g., a fund, pledge, sponsorship, or feedback. By default, a fund is shown. Also, choose a fundraiser, if required.
- If you want to switch from scheduled giving to other donation type, then allocations already allocated to previous donation type will not be transferable to the next.
- You can define more than one allocation for a single scheduled giving.
- Each sum of donated money from a regular giving allocation will be totaled and shown as Total Amount.
- You must complete the Scheduled Giving section before proceeding to payment.
Look at the table below for the different defined allocations which you can make.
| Allocation Types | Functionality |
|---|---|
| Fund | Funds in Engage are called donation items. You can select any donation item, a program, event or campaign, and its fund dimensions including location, theme etc. to donate towards it. |
| Pledge | To add an allocation as a pledge, select the "Pledge" option which opens a Search Pledges pop-up screen. Filter and specify the required parameters to search a pledge or choose any existing one from the list. Pledges containing one or more allocations unavailable to any type of giving will appear blur. Once a pledge is choosen, it appears as 'Towards Pledge - reference number' in the allocations section. |
| Sponsorship | To add an allocation as a sponsorship, click the down arrow to either create a new sponsorship or donate to an existing one. |
| Feedback | To add an allocation as a sponsorship, click the down arrow to either create a new feedback or donate to an existing one. |
- Donation items, including their pricing rules, fund dimensions and fundraisers are added and managed by your system administrator.
- Sponsorship and feedback options appear in the allocation's section for only those accounts which have existing sponsorships and feedbacks.
- You can also manually add an attribution to the donation, if you want to.
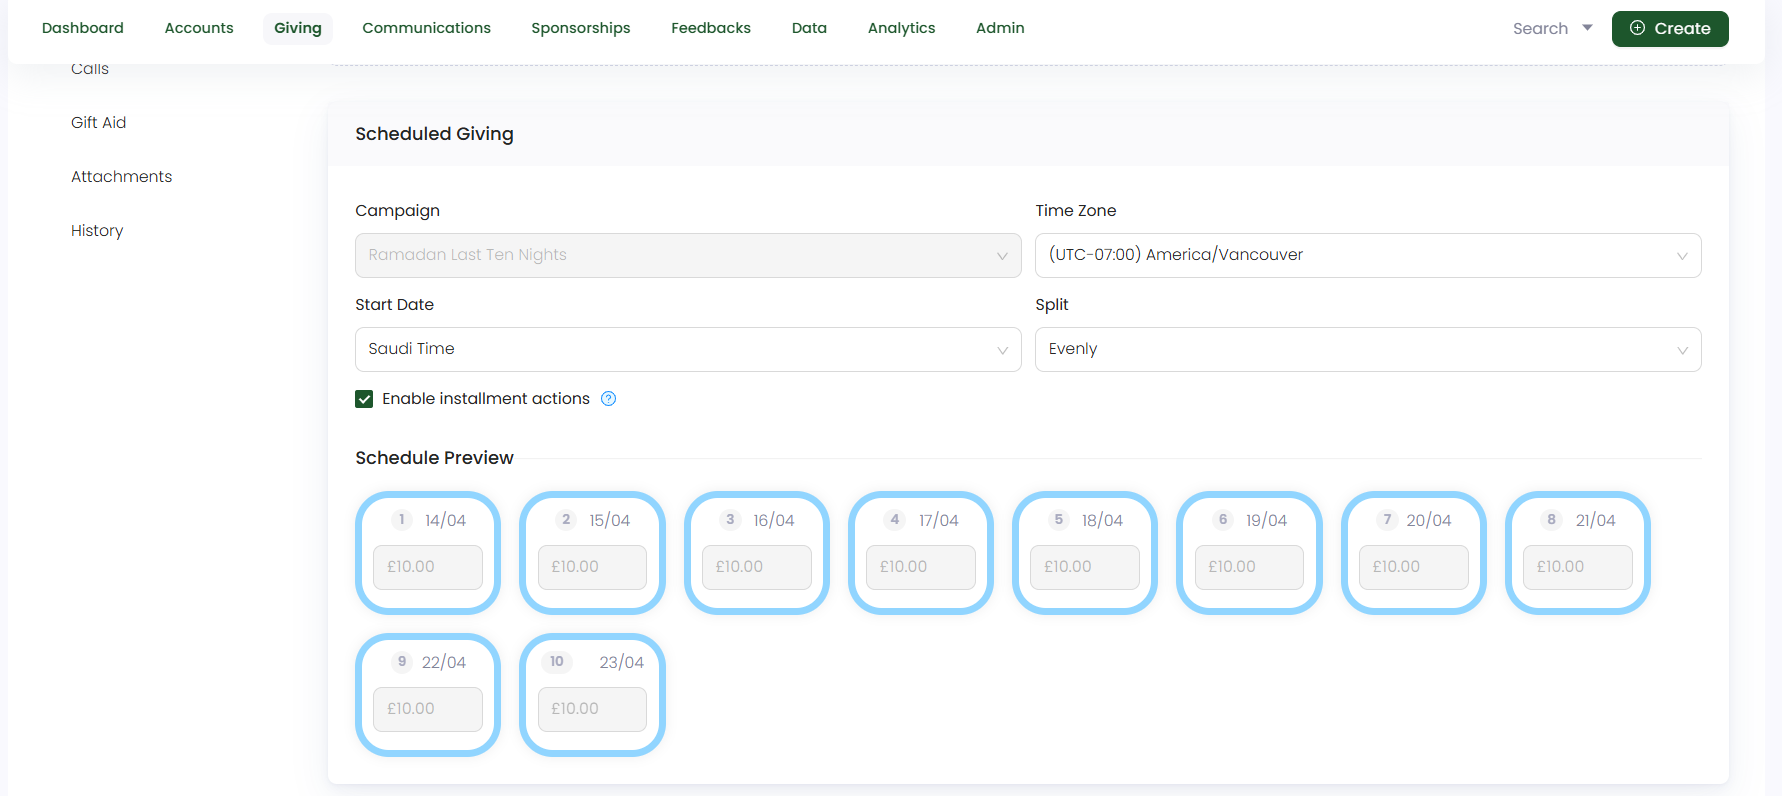
5. Moving onto the Scheduled Giving section;
- Select the campaign (towards which the donation would be scheduled for), timezone, start date (date on which the scheduled donation would start) and split process as saved for the campaign.
- As soon you choose a split, a Schedule Preview pops up with the number of days, date and the amount.
- Tickmark Enable installment actions if you want to generate a correspondence such as a receipt each time a donation is collected.
You can also select the splits as custom and define the schedule preview according to your preference.
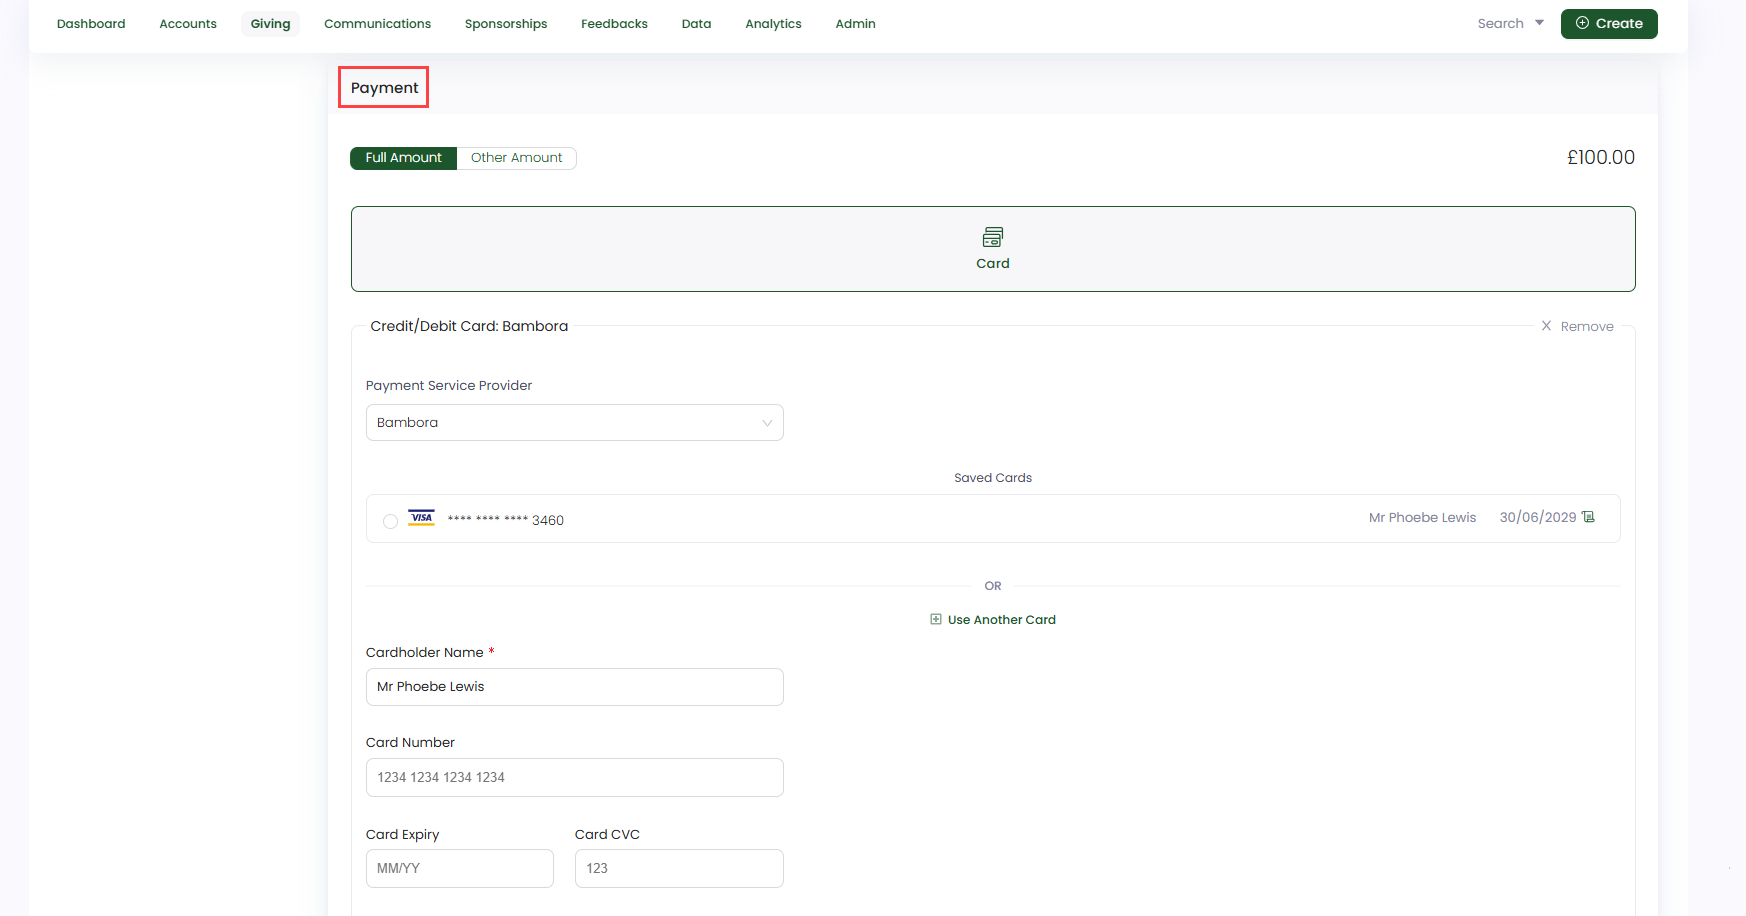
6. In the Payments section, select the payment method as card. Select the payment service provider, choose an existing saved card or add a new one by adding all the required details including cardholder name, number, expiry date, CVC etc. As soon as payment is completed, click Enter Donation.
- Payment methods are added and managed by your system administrator.
- Scheduled donations can be paid with only Card.
- Donations whose payment has not been completed and saved for internal purposes come under the awaiting payment status.